Why start with OpenWBT?
This series does not start with a giant VLA model. It starts with whole-body teleoperation that can actually be debugged. For humanoids, a smart policy on top of an unstable control stack mostly produces attractive simulator videos and confusing real-robot failures. OpenWBT is a practical entry point for Unitree G1/H1. The official repository describes it as whole-body teleoperation using Apple Vision Pro, with support for both real robots and simulation. One operator can control walking, squatting, bending, grasping, and lifting. More importantly, OpenWBT splits the control problem into two debuggable halves: lower-body joystick control and upper-body inverse kinematics from VR hand poses.
This post follows the order a lab should use: read installation.md, build the environment, verify ckpts/loco.onnx and ckpts/squat.onnx, run MuJoCo with python -m deploy.run_teleoperation_mujoco --config run_teleoperation.yaml, and only then consider the real robot command python -m deploy.run_teleoperation_real --config run_teleoperation.yaml --net eno1. If you have read the previous VnRobo posts on GR00T N1 + G1 data collection or UniFoLM-VLA + G1 deployment, treat OpenWBT as a stable execution and demonstration-collection layer rather than another VLA fine-tuning recipe.
Roadmap series
- OpenWBT: G1 Teleop in MuJoCo/Isaac: build the environment, check the ONNX policies, and understand lower-body joystick plus upper-body IK.
- TWIST2: teleoperated imitation for humanoids: turn teleoperation into structured imitation data with synchronized whole-body motion.
- EgoHumanoid: egocentric data for manipulation: connect first-person observations to robot pose and action traces.
- VIRAL: retargeting and skill validation: retarget external motion sources to the target humanoid and measure failure modes.
- FromW1: moving skills onto real hardware: handle sim-to-real issues such as latency, contact, and actuator limits.
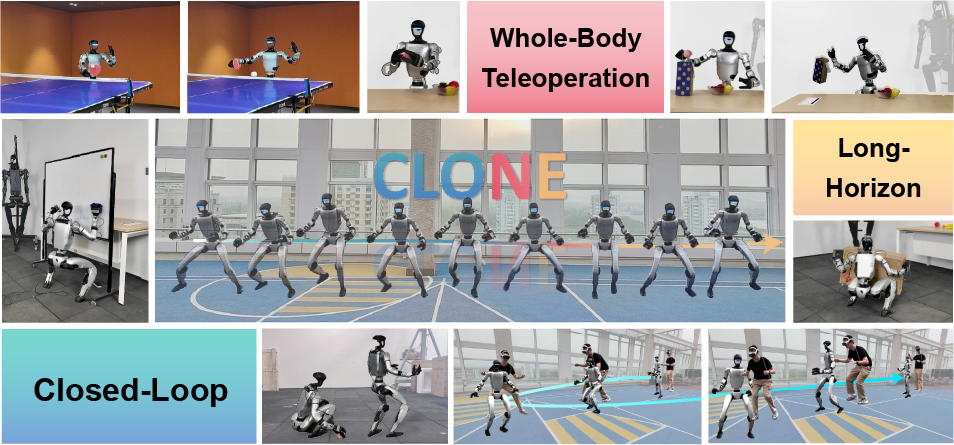
- CLONE: closed-loop whole-body teleop: study closed-loop teleoperation as a long-horizon data stack for loco-manipulation.
Technical sources to keep open
Keep these three references open while following the tutorial:
| Document | Why it matters | Detail to remember |
|---|---|---|
| OpenWBT README | Understand the system goal and launch commands | Supports G1/H1, real hardware, MuJoCo, Isaac Sim; lower body uses joysticks, upper body uses IK |
| OpenWBT installation.md | Build the environment | Ubuntu 20.04, Python 3.8, Pinocchio, ONNX Runtime, MuJoCo, ROS 2 Foxy, Unitree SDK/ROS 2 |
| OpenWBT deploy configs | Verify policies and robot parameters | g1_loco.yaml points to ckpts/loco.onnx, g1_squat.yaml points to ckpts/squat.onnx |
The repository also includes demo media that helps visualize the VR and humanoid setup:
Beginner architecture map
Do not think of OpenWBT as one Python script. It is a control stack with several loops:
Apple Vision Pro / joystick
        |
        | wrist pose, hand pose, joystick command
        v
TeleVisionWrapper + joystick reader
        |
        +--> upper body: G1_29_ArmIK / ik_server.py
        |
        +--> lower body: loco/squat policy ONNX
                    |
                    v
             policy_unified.py
                    |
                    v
             target joint positions
                    |
                    v
        MuJoCo / Isaac Sim / Unitree G1
The lower body and upper body are not forced into a single end-to-end VLA policy. The lower body has two main modes. Locomotion uses ckpts/loco.onnx, a 12-action leg policy with a roughly 47-dimensional observation in the current config, plus clock input from the gait planner. Squat or body-pose control uses ckpts/squat.onnx, a larger observation over 29 DoF, while the main action output still focuses on the lower body. The upper body is not predicted by a VLA in this tutorial. It receives left and right wrist poses from VR, reads the current arm joints, solves IK, and writes the result into the high-level action indices in runner.target_dof_pos.
That design is practical. If the robot loses balance, you debug leg policy, gait phase, command scale, PD gains, or state estimation. If the arms move incorrectly, you debug pose tracking, coordinate frames, or IK. With a single model that consumes images and language and directly emits whole-body joints, benchmark accuracy can look good while the actual failure source remains hidden.
Step 1: clone and create the environment
OpenWBT's installation.md uses ~/OpenWBT as the default working directory, but you can place it wherever your lab keeps robot repos. The official instructions use Conda with Python 3.8:
git clone https://github.com/GalaxyGeneralRobotics/OpenWBT.git
cd OpenWBT

conda create -n OpenWBT python=3.8
conda activate OpenWBT
The core dependency block includes Pinocchio, MeshCat, CasADi, ONNX Runtime, PySerial, and MuJoCo:
# installation.md requires Pinocchio 3.1.0
conda install pinocchio -c conda-forge

pip install meshcat
pip install casadi
pip install onnxruntime
pip install pyserial
pip install mujoco
pip install -r requirements.txt
For beginners, the most common failure is not the policy itself. It is a mixed environment. If your shell automatically sources ROS 2 from .bashrc, parts of the CycloneDDS or Unitree ROS 2 build can fail. The OpenWBT guide recommends commenting out source /opt/ros/foxy/setup.bash in .bashrc and sourcing ROS manually only when running teleoperation.
Step 2: install the Unitree side
Even if you only run MuJoCo at first, you should understand the real-robot side so --net eno1 is not a mystery. OpenWBT uses unitree_sdk2_python and unitree_ros2 for the robot communication path. The installation guide clones the SDK and installs it in editable mode:
git clone https://github.com/unitreerobotics/unitree_sdk2_python.git
cd unitree_sdk2_python
pip install -e .
cd ..
The ROS 2 section uses Foxy, CMake 3.23.3, GCC 9.4.0, rmw_cyclonedds, and a built unitree_ros2 workspace. When connecting a real G1, the host must be on the same subnet as the robot. The guide uses examples such as interface eno1, host IP 192.168.123.xxx, netmask 255.255.255.0, and gateway 192.168.123.1. You must also update NetworkInterface name="eno1" inside ~/unitree_ros2/setup.sh to match your actual Ethernet device.
Before running anything on hardware, verify the network and ROS topics:
ip addr show eno1

source /opt/ros/foxy/setup.sh
source ~/unitree_ros2/setup.sh

ros2 topic list
If ros2 topic list does not show robot-related topics, stop there. Do not run deploy.run_teleoperation_real just to see what happens. With a humanoid, a wrong network interface, wrong DDS setup, or missing state stream can turn a simple launch mistake into a physical safety problem.
Step 3: verify the ONNX policies
OpenWBT keeps the released checkpoints in ckpts/. The two files to check are:
ckpts/loco.onnx
ckpts/squat.onnx
The sub-configs point directly to them:
# deploy/configs/g1_loco.yaml
policy_path: "ckpts/loco.onnx"
use_gait: True
gait_parameters:
  frequencies: 1.5
  phase_offset: 0.5
  stance_ratio: 0.6
control_dt: 0.02
control_decimation: 4
num_obs: 47
num_dof: 12
num_actions: 12
# deploy/configs/g1_squat.yaml
policy_path: "ckpts/squat.onnx"
use_gait: False
control_dt: 0.02
control_decimation: 4
num_obs: 78
num_dof: 29
num_actions: 12
Before opening a viewer, verify that the files exist and that ONNX Runtime can load them:
ls -lh ckpts/loco.onnx ckpts/squat.onnx

python - <<'PY'
import onnxruntime as ort

for path in ["ckpts/loco.onnx", "ckpts/squat.onnx"]:
    sess = ort.InferenceSession(path, providers=["CPUExecutionProvider"])
    print(path)
    print("  inputs :", [(i.name, i.shape, i.type) for i in sess.get_inputs()])
    print("  outputs:", [(o.name, o.shape, o.type) for o in sess.get_outputs()])
PY
You do not need identical metadata across machines, but you do need successful session creation. In policy_unified.py, the loader dispatches by extension: .pt uses TorchScript, while .onnx uses onnxruntime.InferenceSession. The current released policies are ONNX sessions that output an action and hidden state. If ONNX loading fails here, MuJoCo will fail later with a longer traceback and less useful context.
Step 4: read policy_unified.py
policy_unified.py contains two key classes: LocoLowLevelPolicy and SquatLowLevelPolicy.
| Component | Loco policy | Squat policy |
|---|---|---|
| Checkpoint | ckpts/loco.onnx |
ckpts/squat.onnx |
| Main observed DoF | 12 lower-body joints | 29 joints |
| Gait clock | Yes | No |
| Command scale | 3 values, typically forward/lateral/yaw | 2 values, typically squat/body pose |
| Role | Walk, turn, change direction | Stand, squat, adjust body posture |
For locomotion, the observation includes scaled command, gravity orientation, angular velocity, joint position relative to default, joint velocity, previous action, and obs_clock from the gait planner. That gait clock is how loco.onnx knows which foot is in stance or swing. For squat, there is no gait clock because the robot is not generating a periodic stepping pattern.
Both policies clip observations and actions. After inference, the action is scaled by action_scale and added to default_angles to become target joint positions. If upper_action is present, the code concatenates the lower-body action with upper-body targets. This is the key connection point: lower-body policy and upper-body IK are composed without requiring the leg policy to learn arm motion.
Step 5: read gait_planner.py
BipedalGaitPlanner is small but important. It keeps a gait_index, increments it by dt * frequencies, offsets the two feet with phase_offset, and emits sinusoidal clock_inputs. With the defaults in g1_loco.yaml, gait frequency is 1.5, phase offset is 0.5, and stance ratio is 0.6. When stop=True, the planner resets both feet to the stance middle point so the policy does not continue to believe that the robot is in an active step.
The intuition is simple: a locomotion policy does not only need a command such as "move forward". It also needs rhythm. If the rhythm is wrong, the command can be correct while the left and right legs are out of phase. This is one difference between a deployable locomotion policy and a script that merely writes joint targets.
Step 6: understand upper-body IK
In the MuJoCo runner, tv_arms() reads data from TeleVisionWrapper:
head_rmat, left_wrist, right_wrist, left_hand, right_hand = tv_wrapper.get_data()
current_lr_arm_q = runner.qj.copy()[15:29]
current_lr_arm_dq = runner.dqj.copy()[15:29]
sol_q, sol_tauff = arm_ik.solve_ik(
    left_wrist,
    right_wrist,
    current_lr_arm_q,
    current_lr_arm_dq,
)
Then sol_q is clipped around the current target with a small bound and written into runner.target_dof_pos[runner.config.action_hl_idx]. The arms are not allowed to jump instantly to the VR pose. IK solves the target, but the control loop constrains the change to reduce jitter and reduce the risk of self-collision.
deploy/helpers/ik_server.py handles the Isaac Sim path where a client calls IK through a socket. The server receives JSON containing left_wrist, right_wrist, current_lr_arm_q, and current_lr_arm_dq, calls G1_29_ArmIK.solve_ik, then returns sol_q and a success flag. If the solver fails, it returns the current arm joints rather than an undefined command. That is the right safety bias: holding the current state is usually better than sending an unknown target.
Step 7: run MuJoCo first
The OpenWBT README gives this MuJoCo launch sequence:
source /opt/ros/foxy/setup.sh
source ~/unitree_ros2/setup.sh

python -m deploy.run_teleoperation_mujoco \
  --config run_teleoperation.yaml
run_teleoperation.yaml is the top-level config. It points squat_config to g1_squat.yaml, loco_config to g1_loco.yaml, uses resources/robots/g1_description/g1_29dof_camera.xml, sets control_dt: 0.02, sets control_decimation: 4, and describes a 29-DoF robot. The program starts in SQUAT mode and prints a prompt to press Left_A to enter locomotion. In locomotion mode, the runner calls run_loco(manual=True). In squat mode, it calls tv_arms() first and then run_squat(manual=True).
Use a slow validation sequence:
- Open MuJoCo and do not command anything. Check whether the robot stands.
- Stay in squat mode and adjust body pose very lightly.
- Enter locomotion and send a small command, such as a very slow forward motion.
- Stop locomotion and check whether the gait planner resets cleanly.
- Only then enable VR hand pose if the lower body is stable.
If you use Isaac Sim, the README specifies Isaac Sim V4.5.0. With VR devices, run two terminals:
bash start_ik_server.sh
bash start_isaacsim_vision.sh
For non-VR usage:
bash start_isaacsim.sh
The important distinction is that the Isaac path makes the IK server more explicit, while the current MuJoCo script directly creates G1_29_ArmIK inside the same process.
Step 8: move to real hardware only after sim works
The real-robot command from the README is:
source /opt/ros/foxy/setup.sh
source ~/unitree_ros2/setup.sh

python -m deploy.run_teleoperation_real \
  --config run_teleoperation.yaml \
  --net eno1
Replace eno1 with the actual interface connected to the robot. For a debug mode where policy action is not executed, the README shows:
python -m deploy.run_teleoperation_real \
  --config run_teleoperation.yaml \
  --net eno1 \
  --debug
The physical robot startup sequence is also specific: power on the robot, use the Unitree remote to enter deployable mode, move to ready pose, enter damping mode, and only then run teleoperation. The default joystick devices are /dev/ttyACM0 and /dev/ttyACM1, so you may need:
sudo chmod -R 777 /dev/ttyACM0
sudo chmod -R 777 /dev/ttyACM1
For real hardware, emergency stop access and physical clearance are part of the test, not a footnote. The OpenWBT README also recommends a conservative first deployment strategy: keep distance from the robot, be ready to kill the policy, and stop immediately if behavior looks unusual.
How OpenWBT differs from GR00T and UniFoLM
| Criterion | OpenWBT | GR00T/UniFoLM VLA |
|---|---|---|
| Main goal | Stable whole-body teleoperation | Learn manipulation policies from broad robot data |
| Main input | Joystick, VR wrist pose, robot state | Camera, language instruction, robot state |
| New learning in this tutorial | No VLA fine-tuning required | Usually needs post-training or embodiment/task fine-tuning |
| Strength | Debuggable control loops, practical sim-to-real path | Task generalization and language-conditioned behavior |
| Beginner risk | Network, ROS, DDS, IK, joystick setup | Dataset quality, action normalization, checkpoint loading, inference latency |
The older GR00T and UniFoLM posts on VnRobo focus on data, checkpoints, inference servers, and ways to bring a VLA onto a robot. OpenWBT takes another route: it makes a human operator control the whole-body humanoid reliably, then lets that system become a basis for demonstration collection or WBC benchmarking. This tutorial is not trying to replace VLA. It answers a lower-level but essential question: can the robot stand, squat, walk slowly, accept wrist poses, move arms without jitter, and switch modes without falling?
If the answer is no, more VLA fine-tuning is usually not the right fix. You need to debug the controller, gait planner, IK, PD gains, network interface, or VR calibration first.
Common failure checklist
| Symptom | Likely cause | What to check |
|---|---|---|
| ONNX fails to load | Missing onnxruntime or wrong checkpoint file |
Run the InferenceSession script before opening the simulator |
| Robot falls immediately in MuJoCo | XML/config/policy mismatch or wrong observation | Check run_teleoperation.yaml, g1_loco.yaml, and g1_squat.yaml |
| Joystick is not detected | Wrong /dev/ttyACM* or insufficient permissions |
Run ls /dev/ttyACM* and apply temporary permissions |
| Real robot has no topics | Wrong ROS/DDS/interface setup | Check ip addr, source ~/unitree_ros2/setup.sh, run ros2 topic list |
| Arms jitter during teleop | IK target jumps, frame transform is wrong, or VR latency is high | Test upper body separately while lower body stays in squat |
| Isaac Sim does not receive IK results | Server not running or socket issue | Run bash start_ik_server.sh and inspect connection logs |
Conclusion
OpenWBT is the right first post for a "Whole-Body Humanoid VLA 2026" hands-on series because it forces us to establish the control layer before discussing larger models. Build the environment, verify loco.onnx and squat.onnx, run MuJoCo first, understand policy_unified.py, gait_planner.py, and ik_server.py, and only then move to the real robot through --net eno1. Once this stack is stable, the later posts on imitation, egocentric data, retargeting, and closed-loop teleoperation have a much firmer foundation.