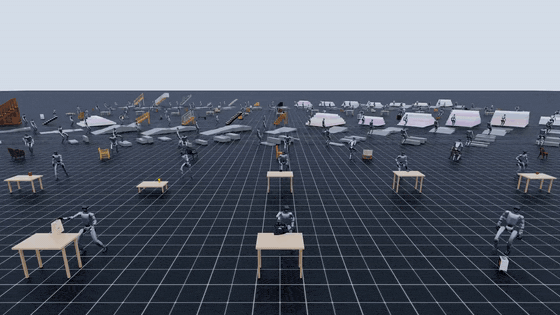
In part 1, we treated 3D objects and terrain as the input layer of GRAIL. Part 2 moves to the next stage: generating 2D human-object interaction (2D HOI) videos from a known 3D scene. This is the bridge between static assets and the metric 4D reconstruction covered in part 3: Blender renders the conditioning frame, camera parameters, and depth; Kling generates a short human-object interaction video; the render metadata is kept so downstream stages do not need to infer scale and camera geometry from an unconstrained internet video.
The NVIDIA GRAIL project page describes the core idea clearly: instead of starting from arbitrary in-the-wild videos, GRAIL starts from a fully specified 3D configuration where object geometry, camera parameters, metric scale, environment depth, and a robot-proportioned character are known before video generation. The official 2D HOI documentation describes this stage as a chain of physics simulation, multi-view Blender rendering, and a video foundation model, with Kling AI as the default video backend. In practical terms, the 2D video is not the final dataset. It is a controlled visual prior for 4D HOI recovery.
Technical sources used for this walkthrough:
What You Will Run
By the end of this article, you should be able to run a ComAsset/cordless_drill smoke test, understand the important fields in configs/gen_2dhoi/manipulation.yaml, know what skip_step1 and skip_step2 control, inspect the output folders initial_states, asset_renders, cameras, depth_maps, and videos_kling, and switch to terrain_stairs.yaml, sitting.yaml, pickup_table.yaml, or pickup_ground.yaml when the task changes.
The central command is:
python -m grail.pipelines.gen_2dhoi \
  --dataset ComAsset \
  --category cordless_drill \
  --character kid \
  --results_dir results \
  --video_model_api kling-ai
Run it from the root of the GRAIL repository. The official docs explicitly call this a package entrypoint; there is no project-root wrapper script for this stage. In the standard Docker workflow, you pull the GRAIL image, mount the repository, install Blender and checkpoints inside the container, activate the grail Conda environment, and source .env so the process can see OPENAI_API_KEY, KLING_ACCESS_KEY, KLING_SECRET_KEY, and any other required tokens.
Reading manipulation.yaml
configs/gen_2dhoi/manipulation.yaml is the default config for tabletop or handheld manipulation. The top of the file sets the character, asset paths, output root, and object config:
character: kid
character_dir: data/characters
texture_dir: data/characters
results_dir: results_collection/manipulation001
object_config: configs/objects/comasset.yaml
verbose: false
skip_step1: false
skip_step2: true
skip_step3: false
skip_step4: false
skip_done: false
For beginners, the most important default is skip_step2: true. That does not mean scale is unimportant. It means most objects in configs/objects/comasset.yaml already ship with hand-tuned object scales. For example, cordless_drill uses obj_scale: [2.5, 2.5, 2.5] and scene: indoor2-manipulation. The smoke test therefore does not need to spend time and OpenAI API calls on scale search.
In contrast, skip_step1: false means the pipeline does run Blender Bullet settling by default. A generated or catalog object may be exported in an arbitrary pose. If you render it directly, it can float, clip through the table, or rest on an unnatural edge. Step 1 drops the object from a small height, lets Bullet settle the rigid body, and saves the final stable orientation for later rendering.
The key parameters are:
| Field | Default in manipulation.yaml |
Practical meaning |
|---|---|---|
skip_step1 |
false |
Whether to skip Bullet settling for stable object orientation |
skip_step2 |
true |
Whether to skip render plus OpenAI vision scale optimization |
rendering.num_rand_scenes |
3 |
Number of random camera/lighting variants per object |
rendering.samples |
32 |
Blender render samples, trading quality against speed |
rendering.width / height |
1280 / 720 |
Conditioning frame resolution |
video.kling_model_name |
kling-v2-5-turbo |
Kling model passed to the image-to-video adapter |
video.duration |
"5" |
Video segment length in seconds |
video.kling_mode |
pro |
Kling generation mode |
video.video_max_retries |
100 |
Maximum retries for a valid video response |
video.video_retry_wait |
30 |
Seconds to sleep between retries |
If you only want to render images and inspect the scene without calling Kling, skip step 4:
python -m grail.pipelines.gen_2dhoi \
  --dataset ComAsset \
  --category cordless_drill \
  --character kid \
  --skip_step1 \
  --skip_step2 \
  --skip_step4 \
  --results_dir results
This is the right mode when you do not have Kling credentials yet or when you are debugging camera, scale, and placement. Step 3 can still produce rendered images, camera files, and depth maps.
Step 1: Blender Bullet Settling
Step 1 calls a Blender simulation script to generate the initial object state. The default simulation block is:
simulation:
  drop_height: 0.1
  settling_time: 5.0
  initial_rotation_perturbation: 2.0
  seed: 42
  save_usd: false
  use_initial_state: true
drop_height: 0.1 means the object is dropped from slightly above its placement target, not from far above the scene. settling_time: 5.0 gives Bullet five seconds to let the object fall, collide, rotate, and stop. initial_rotation_perturbation: 2.0 adds controlled variation to the initial orientation, avoiding a perfectly artificial pose while keeping the simulation manageable.
The output lives under:
results/generation/initial_states/
Think of this folder as the cache for "how this object rests stably." Once it exists and you trust it, you can skip step 1 on later runs:
python -m grail.pipelines.gen_2dhoi \
  --dataset ComAsset \
  --category cordless_drill \
  --character kid \
  --skip_step1 \
  --skip_step2 \
  --results_dir results
Only use --skip_step1 when the cached initial state exists and still matches your object mesh and scene. If you regenerate the mesh, change the object rotation, alter contact surfaces, or delete the cache, run step 1 again. A common failure mode is a video where the object starts in a physically strange orientation because the pipeline reused a stale or missing initial state.
Step 2: OpenAI Scale Evaluation
Step 2 determines object scale using iterative rendering plus chat-vision evaluation. The pipeline renders a temporary scene, asks the model whether the object looks small, big, or correct relative to the person and room, then updates the scale using exponential expansion and binary search. The default search budget is:
scale:
  max_iterations: 5
In manipulation.yaml, this step is skipped because ComAsset objects already have scales. The relevant object config contains:
objects:
  cordless_drill:
    obj_scale: [2.5, 2.5, 2.5]
    scene: indoor2-manipulation
When should you run step 2? Do it when you add a new object without a reliable scale, when a Hunyuan3D mesh looks clearly too small or too large next to the character, or when the object category differs from the existing ComAsset assumptions. Step 2 needs OPENAI_API_KEY; without it, the vision evaluation cannot happen.
A practical beginner rule is:
| Situation | Recommended action |
|---|---|
Running the cordless_drill smoke test |
Keep skip_step2: true |
| Changing render/camera settings but keeping the same object config | Keep skip_step2: true |
| Adding a new object with unknown scale | Run step 2 once and inspect obj_scales |
The object is visibly wrong but OpenAI returns correct |
Manually fix configs/objects/*.yaml and render again |
| Running without external API calls | Use known scales and keep skip_step2 enabled |
Step 2 writes to:
results/generation/obj_scales/
This article focuses on the requested output folders, but obj_scales explains why skip_step2 is safe for known objects and risky for new ones.
Step 3: Render Scene, Camera, and Depth
Step 3 is the real Blender render pass for the video model and downstream reconstruction:
rendering:
  samples: 32
  width: 1280
  height: 720
  num_rand_scenes: 3
  gpu: true
  no_rand_seed: false
  render_start_end: false
rendering.num_rand_scenes: 3 creates three random scene variants, usually identified by seeds such as rand00001, rand00002, and rand00003. Each variant changes camera and lighting while preserving the object, character, and scene configuration. This is an inexpensive way to increase data diversity: the same cordless_drill can produce multiple conditioning frames before the pipeline calls Kling.
The important outputs are:
results/generation/asset_renders/
results/generation/cameras/
results/generation/depth_maps/
asset_renders contains the rendered PNG frames. Open these first when debugging. Check that the object is visible, the character is framed, the camera is not too close, and the interaction target is obvious. If the rendered input is wrong, the video model will usually amplify the mistake.
cameras contains camera parameters, commonly serialized as pickle files. These files are geometry, not decoration. GRAIL benefits from knowing the camera before video generation; part 3 will use that known context to reduce ambiguity during 4D HOI recovery.
depth_maps contains Blender depth output. For arbitrary videos, depth often has to be estimated. In GRAIL, the initial scene depth comes from the known synthetic scene, which gives the downstream optimizer a better metric anchor.
Before calling Kling, check:
- PNGs in
asset_rendersclearly show both person and object. - The object is not clipping through the table or floor.
- The character's body is not cropped in a way that hides hands or feet.
- The camera is static and far enough to preserve the interaction.
- Camera and depth files exist for the same seeds as the renders.
- If you increase
num_rand_scenes, you understand that video cost increases too.
Step 4: Prompt Refinement and Kling Video
Step 4 takes a rendered image as the input frame, selects a base prompt, optionally refines it with OpenAI vision/chat, and calls Kling image-to-video. In manipulation.yaml:
video:
  num_videos: 1
  num_video_segments: 1
  model_api: kling-ai
  kling_model_name: kling-v2-5-turbo
  duration: "5"
  kling_mode: pro
  skip_prompt_refinement: false
  base_prompt:
    - The person interacts with the object. The camera should remain static.
    - The person moves the object (pull or push). The camera should remain static.
  video_max_retries: 100
  video_retry_wait: 30
video.kling_model_name is the specific model name passed to the Kling adapter. If the Kling API changes or your account has access to a different model, this is the field to change. video_retry_wait: 30 means the pipeline sleeps 30 seconds between failed or unfinished attempts. With video_max_retries: 100, a bad render or a congested API queue can keep a job alive for a long time. During debugging, keep num_rand_scenes small and num_videos: 1.
Prompt refinement serves two purposes. First, it makes the prompt object-specific, for example turning a generic interaction into "a person picks up a cordless drill and keeps holding it." Second, it reinforces the static camera constraint. GRAIL wants static-camera video because reconstruction depends on geometric consistency. A moving cinematic camera may look better as media, but it is usually worse as reconstruction input.
The final videos are written under:
results/generation/videos_kling/
For the smoke test, expect MP4 files under the dataset/category path:
results/
  generation/
    videos_kling/
      ComAsset/
        cordless_drill/
          kid_indoor2-manipulation_rand00001.mp4
          kid_indoor2-manipulation_rand00002.mp4
          kid_indoor2-manipulation_rand00003.mp4
The exact filenames may vary with scene key and video index, but the pattern should include character, scene, and random seed. If videos_kling is empty, check in this order: rendered PNGs exist, OPENAI_API_KEY is loaded, KLING_ACCESS_KEY and KLING_SECRET_KEY are loaded, the logs show successful prompt refinement or a fallback, and the Kling adapter is not retrying indefinitely.
Smoke Test: ComAsset/cordless_drill
A good smoke test is cheap, visually easy to evaluate, and close to the default config. cordless_drill fits because it is handheld, asymmetric, already scaled in comasset.yaml, assigned to indoor2-manipulation, and easy for a video model to interpret. The desired action can be simple: a person approaches, holds, moves, pulls, or pushes the drill while the camera stays static.
Run the full pipeline:
source .env
python -m grail.pipelines.gen_2dhoi \
  --dataset ComAsset \
  --category cordless_drill \
  --character kid \
  --results_dir results \
  --video_model_api kling-ai
If this is your first run in the container, verify Blender setup. The code looks for Blender at imports/blender/blender; if it is missing, the error will point you to bash scripts/setup/install_env_docker.sh. That is an environment setup issue, not an object or prompt issue.
After the run, inspect outputs in stage order:
find results/generation/initial_states -maxdepth 3 -type f | head
find results/generation/asset_renders -maxdepth 4 -name '*.png' | head
find results/generation/cameras -maxdepth 4 -type f | head
find results/generation/depth_maps -maxdepth 4 -type f | head
find results/generation/videos_kling -maxdepth 4 -name '*.mp4' | head
Do not start by watching every video. Open the render first. If the render is wrong, the video is not worth evaluating. If the render is good but the video is wrong, then adjust prompt, model name, duration, or random seed.
When to Increase num_rand_scenes
num_rand_scenes increases diversity, but it also increases cost. With 3, you get three camera/lighting variants for one object. With 10, you have more chances to get a good video, but you also create more video generation requests. Since each video can retry many times, changing 3 to 10 is not a small change.
A practical schedule:
| Phase | num_rand_scenes |
Reason |
|---|---|---|
| Environment smoke test | 1 or 3 |
Find Blender/API issues quickly |
| New object inspection | 3 |
Enough to judge scale and camera stability |
| Small batch generation | 5 |
Better diversity without runaway cost |
| Dataset generation | 10+ |
Only after prompts, scenes, and caches are stable |
You may be able to override config values from the CLI depending on parser support, but for beginners the least confusing method is to copy the config, edit rendering.num_rand_scenes, and pass the file with --config.
Switching to Stairs, Sitting, and Pickup
Once the manipulation smoke test works, switch configs:
# Terrain stairs
python -m grail.pipelines.gen_2dhoi \
  --config configs/gen_2dhoi/terrain_stairs.yaml \
  --results_dir results

# Sitting
python -m grail.pipelines.gen_2dhoi \
  --config configs/gen_2dhoi/sitting.yaml \
  --results_dir results

# Pickup from table
python -m grail.pipelines.gen_2dhoi \
  --config configs/gen_2dhoi/pickup_table.yaml \
  --results_dir results

# Pickup from ground
python -m grail.pipelines.gen_2dhoi \
  --config configs/gen_2dhoi/pickup_ground.yaml \
  --results_dir results
These configs differ in more than prompt text. terrain_stairs.yaml uses synthetic stair object configs, sets skip_step1: true, skip_step2: true, uses num_rand_scenes: 10, uses duration "10", and switches kling_model_name to kling-v3. Terrain does not need the same Bullet settling as a handheld object because the staircase is scene geometry. The prompt is also more constrained: the person should climb carefully, stay visible, and avoid walking through the ceiling or leaving the frame. That sounds like prompt engineering, but it is really data constraint engineering for reconstruction and locomotion.
sitting.yaml uses configs/objects/chair_sitting.yaml, samples: 128, num_rand_scenes: 10, no_rand_seed: true, and prompts such as "walks over and sits down on the chair naturally." Sitting is different from manipulation because the final contact is body-to-chair, not hand-to-object. You need the seat, back, legs, and approach direction to be clear in the render.
The pickup configs split tabletop pickup and ground pickup. Tabletop pickup is close to manipulation but has a clearer action target: approach, grasp, and lift. Ground pickup is harder because the person must bend or squat; if the camera crops the legs or the object is too small, the generated video often fails.
Debug by Output Folder
When the pipeline fails, debug forward by stage instead of guessing from the final video:
| Folder | If missing or wrong | Common cause |
|---|---|---|
initial_states |
No state file or strange object pose | Blender setup error, wrong skip_step1, bad mesh/collision |
asset_renders |
No PNG or wrong scene | Wrong object config, wrong scene key, bad scale, cropped camera |
cameras |
Missing camera pickle | Render step did not finish or was skipped incorrectly |
depth_maps |
Missing depth | render_scene failed or output paths are wrong |
videos_kling |
No MP4 | Kling credentials, prompt refinement, API retries, invalid render input |
One common trap is using --skip_done after producing bad outputs. skip_done checks whether files exist; it does not judge quality. If you change scale or prompt after a bad run, use a fresh results directory or remove the specific bad outputs before rerunning. For production batches, keep the config and random seeds with the output so you can trace failures.
Why GRAIL Needs 2D Video
If the scene is already 3D, why not optimize the motion directly in simulation? Because the video foundation model contributes a human motion prior: how a person approaches an object, reaches, grasps, lifts, pushes, sits, or climbs. GRAIL does not blindly trust the video. It uses the video as a visual motion prior and then constrains reconstruction with the known geometry, depth, camera, scale, and robot-proportioned character.
That is why the 2D HOI stage has to be both expressive and disciplined. It must be expressive enough for the video model to generate natural human behavior, but disciplined enough for the reconstruction pipeline to recover metric motion. In part 4, the terrain branch applies the same principle to curb, slope, and stair traversal. In part 5, the recovered motion is retargeted to Unitree G1, where scale or camera mistakes from this stage become robot motion errors. Treat this stage as the place to slow down, inspect renders, test prompts, and only then fan out.