Why RUKA-v2 Matters
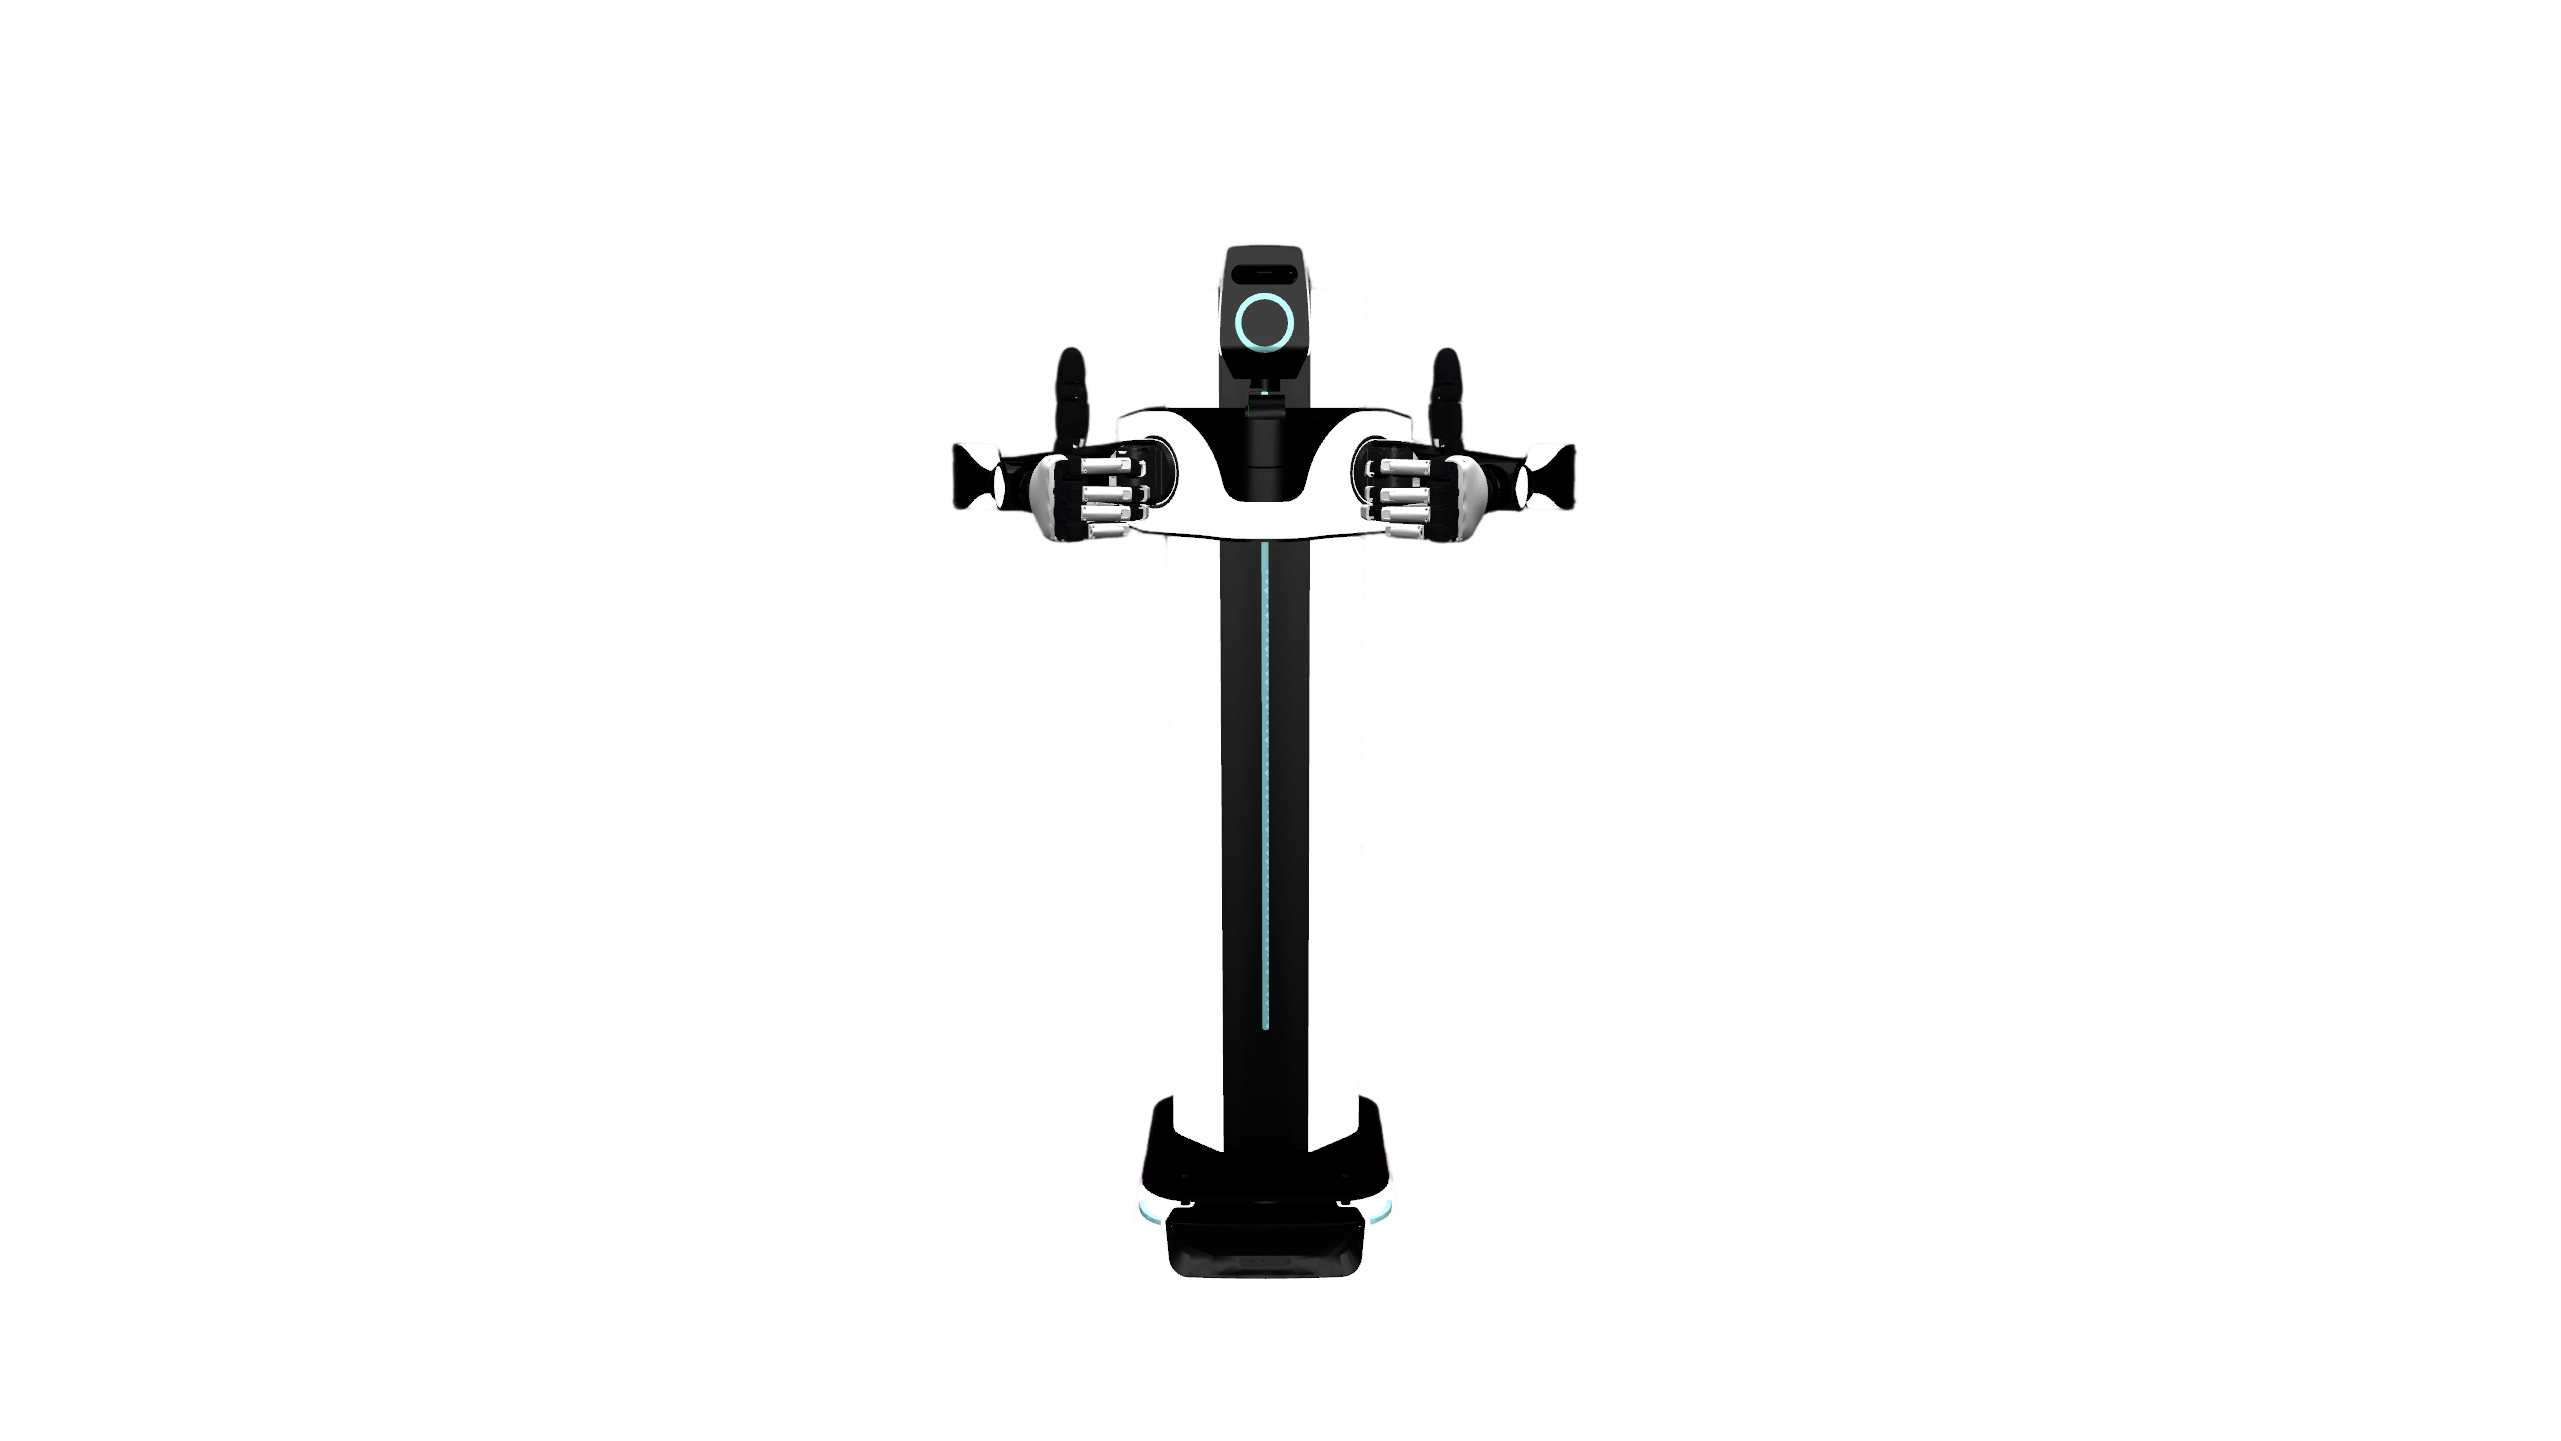
RUKA-v2 is the second-generation version of RUKA, an open-source humanoid, tendon-driven robotic hand from New York University and New York University Shanghai. The project is interesting because it is not just a high-DOF hand. It is a reproducible robot learning platform: editable CAD, assembly documentation, controller software, teleoperation support, Franka/OpenTeach integration, attachable encoders, and a path from human demonstrations to autonomous policy rollouts.
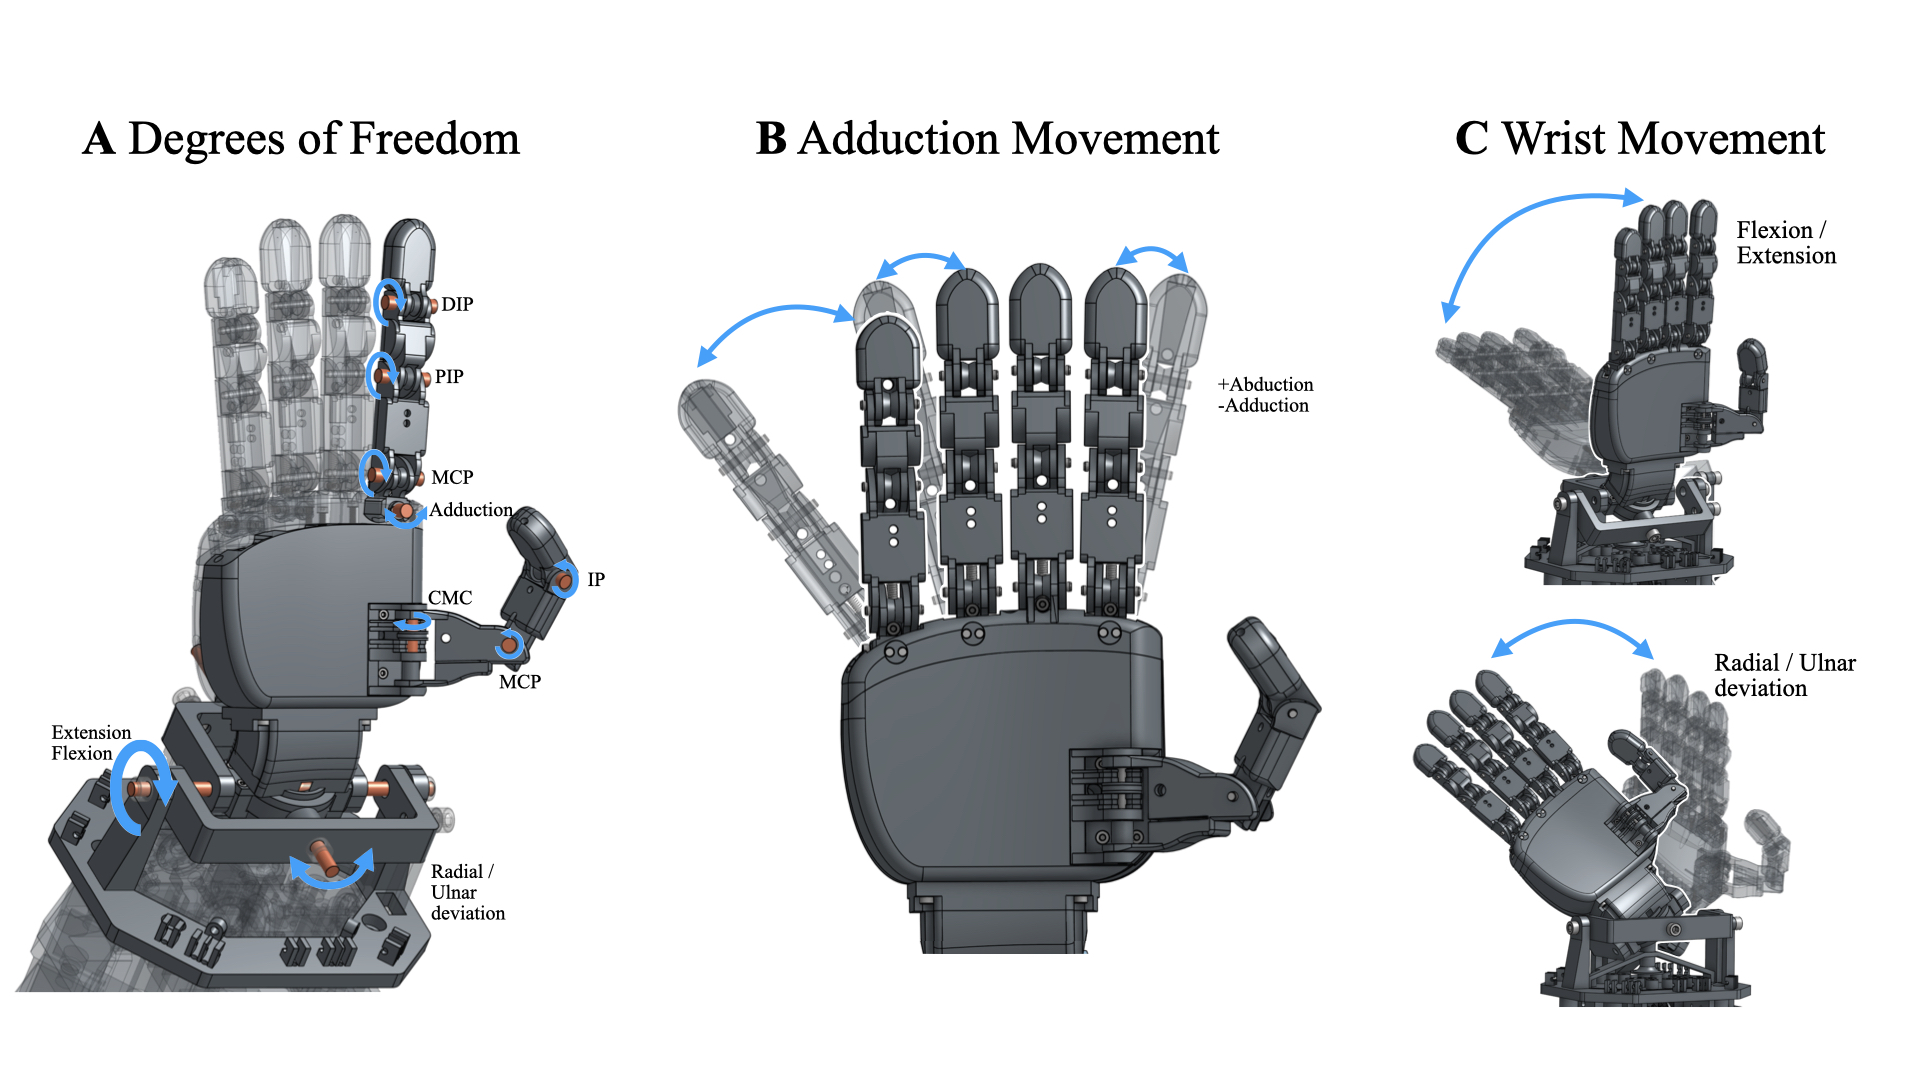
The original paper, "Ruka-v2: Tendon Driven Open-Source Dexterous Hand with Wrist and Abduction for Robot Learning", appeared on arXiv on March 27, 2026, with v2 on March 30, 2026. The main upgrade over RUKA v1 is practical dexterity: a decoupled 2-DOF wrist and finger abduction/adduction. These two additions unlock many everyday manipulation behaviors that are hard with a static wrist and fingers that only curl: picking a pen from a vertical holder, opening a book, reaching inside constrained spaces, grasping thin objects, and stabilizing objects during in-hand adjustment.
One terminology note matters. This guide calls the hand 16 active DOF because the policy learning setup uses 16 RUKA-v2 joint positions for the hand. The paper also compares the platform as 20 total DOF / 16 actuated DOF when accounting for mechanical joints, coupling, and the wrist. In practice, a builder should think of it as a 16-actuated hand-wrist platform with additional mechanical structure that makes the motion closer to a human hand.
If you are new to robot hands, first understand three foundations: dexterous manipulation, imitation learning, and diffusion-style visuomotor policy. RUKA-v2 sits at the intersection of those topics: capable hardware, natural teleoperation, and real demonstrations for policy learning.
The Core Idea
The paper's argument is pragmatic: robot learning algorithms have improved quickly, but accessible dexterous hardware is still a bottleneck. Shadow Hand is powerful but expensive. Allegro and LEAP are common in research, but their geometry and lack of integrated wrist motion create an embodiment gap. Many tendon-driven hands have a better human-like form factor, but are hard to reproduce because hardware files, software, or assembly documentation are incomplete.
RUKA-v2 chooses a tendon-driven design. Motors sit near the forearm/motor base, and tendon lines transmit force to the fingers. This keeps the fingers lighter and more human-like than placing an actuator directly inside every phalanx. The tradeoff is control complexity: tendon friction, slack, routing, and tension vary across builds. A useful RUKA-v2 build is therefore not just printed parts and motors. It is printed parts, clean tendon routing, calibration, controller mapping, and data collection discipline.
The paper contributes four main pieces:
| Component | Practical value |
|---|---|
| Decoupled 2-DOF parallel wrist | Independent flexion/extension and radial/ulnar deviation for manipulation in tight spaces |
| Finger abduction/adduction | Fingers can spread and converge for thin objects, pens, books, and in-hand stabilization |
| Attachable magnetic encoders | AS5600 12-bit angle sensing for calibration without relying on expensive motion capture gloves |
| Open robot learning stack | Controller code, retargeting, Franka/OpenTeach teleoperation, and BAKU policy learning |
A useful mental model:
Human hand / VR headset / camera
          |
          v
Retargeting human pose -> desired RUKA-v2 joint angles
          |
          v
Joint-to-motor mapping + calibrated motor limits
          |
          v
Dynamixel motors -> tendon routing -> fingers + wrist
          |
          v
Teleoperation demos -> BAKU visual BC policy -> autonomous rollout
Hardware Architecture
Before building, understand the five major assemblies:
| Assembly | Role | Builder's risk |
|---|---|---|
| Fingers | DIP, PIP, MCP motion and tendon paths | Crossed lines, sharp bends, friction |
| Knuckle modules | MCP flexion plus abduction/adduction | Overtightened screws and blocked motion |
| Palm/backhand | Holds fingers and PTFE tubes | PTFE tubes protruding too far or binding tendons |
| 2-DOF wrist | Flex/extend plus radial/ulnar deviation | Bearings, washers, and pivot alignment |
| Motor base/pulleys | Holds Dynamixel motors and tendon spools | Loose knots, bad motor IDs, wrong tension |
The wrist is the most important mechanical upgrade. It uses a parallel decoupled mechanism: the common rotation center is defined by a passive ball joint, while two independent linkage chains actuate the two wrist axes. Finger tendons pass near the wrist rotation center and then through a bearing-supported routing plate. This reduces unwanted tendon-length changes when the wrist rotates, which helps the fingers remain controllable across wrist poses.
The abduction/adduction mechanism uses a dedicated tendon for lateral finger motion and a spring return to neutral. The middle finger stays fixed as a geometric reference. This gives the hand enough lateral finger spacing to grasp thin or irregular objects while preserving a stable reference for calibration and retargeting.
The official BOM lists the main electronics:
| Part | Quantity | Notes |
|---|---|---|
| DYNAMIXEL XL330-M288-T | 11 | Small motors for many finger DOF |
| DYNAMIXEL XM430-W210-R | 2 | Stronger motors used for wrist axes |
| DYNAMIXEL XL430-W250-T | 3 | Additional higher-load actuators |
| U2D2 | 1 | USB interface for Dynamixel |
| 12V/5V power supply | 1 | Power for motor bus and auxiliary electronics |
| Braided fishing line, 0.75 mm or 0.68 mm | 1 | Tendons |
| PTFE tubing, 2 mm ID and 4 mm OD | 1 | Tendon guides |
The tool list is intentionally accessible: 3D printer, soldering iron, M2/M3/M5 Allen keys, tweezers, and pliers. Optional but useful items include sandpaper, drill bits, and soldering tips for heat-set brass inserts. For a first build, the two things most likely to waste time are misaligned heat-set inserts and messy tendon routing. Do not power the hand until every joint can move smoothly by hand.
CAD, Printing, and Workspace
The build should move from dry mechanical assembly to electronics, and only then to software:
1. Download CAD/STL files and the BOM
2. Print plate sets, fingertip replacements, and encoder mounts
3. Install heat-set inserts
4. Assemble finger tendons and joint strings
5. Assemble knuckle modules
6. Assemble palm, PTFE tubes, and wrist connector
7. Assemble wrist, bearings, washers, and routing plate
8. Assemble motor base, pulleys, and motors
9. Wire motors, assign IDs, and perform a power-on test
10. Calibrate, reset, teleoperate, and collect data
The official CAD documentation uses 0.2 mm layer height and different infill levels for different STL groups, including 100%, 50%, and 30%. Do not reduce infill on structural wrist or motor-base parts until you have your own load tests. RUKA-v2 has many small dowel and bearing holes; a small print tolerance error can make a joint sticky. The docs note that if dowels are extremely difficult to insert into the bearing plate, you may need to reprint with adjusted settings or drill the hole to 2.5 mm.
For heat-set inserts, the assembly docs recommend pressing the insert flush near the final millimeter. A proud insert can tilt a plate; an insert pushed too deep can reduce thread engagement. After each mechanical subassembly, run this checklist:
[OK] The joint rotates freely before tendon tension is applied
[OK] Pulling the tendon curls the intended joint in the intended direction
[OK] Releasing the tendon lets the spring or mechanism return to neutral
[OK] Lines do not cross, scrape sharp edges, or rub moving parts
[OK] Wrist motion does not unexpectedly tighten finger tendons
Electronics and Safe Power-On
Because RUKA-v2 uses Dynamixel motors, wiring is not only about power. You need the correct voltage, motor IDs, bus wiring, USB interface, and current limits. The assembly docs describe XT60 pigtails for 5V and 12V outputs, ground and power wiring for 3-pin and 4-pin connectors, and the required data-line connections for the bus.
Before the first powered test:
[ ] Power supply voltage is correct
[ ] Current limits are enabled and conservative
[ ] Human fingers are clear of the mechanism
[ ] Motor IDs match the left/right configuration
[ ] Tendons are not overtightened in the reset pose
[ ] U2D2 or USB serial device appears on the host
[ ] You can disconnect power immediately if a motor moves the wrong way
If you install the optional encoder setup, the docs describe an ESP32 QTPy, a TCA9548A I2C multiplexer, and AS5600 sensors. The sample mux mapping is:
| Mux port | Joint |
|---|---|
| 0 | Index abduction |
| 1 | Index DIP |
| 2 | Index PIP |
| 3 | Index MCP |
| 4 | Thumb CMC |
| 5 | Thumb MCP |
| 6 | Thumb DIP |
The encoders are not required for basic teleoperation, but they are valuable if you want to measure tracking error, refine joint-to-motor calibration, compare multiple builds, or train policies that transfer more reliably.
Software Installation
The main repository is ruka-hand-v2/RUKA-v2 on GitHub. The README uses Conda with Python 3.10:
git clone --recurse-submodules https://github.com/ruka-hand-v2/RUKA-v2
cd RUKA-v2
conda env create -f environment.yml
conda activate ruka_hand
pip install -r requirements.txt
pip install -e .
Important packages include pytorch, dynamixel_sdk, numpy, pandas, opencv-python, hydra-core, wandb, diffusers==0.11.1, einops, h5py, flask, zmq, record3d, and osfclient. On Linux, if opening /dev/ttyUSB0 fails with a permission error, the README suggests adding your user to the dialout group and rebooting:
sudo usermod -aG dialout $USER
sudo reboot
After plugging in the hand, identify the port:
ls /dev/ttyUSB*
Then update USB_PORTS in ruka_hand/utils/constants.py:
USB_PORTS = {
    "left": "/dev/ttyUSB0",
    "right": "/dev/ttyUSB1",
}
Test the reset pose:
python scripts/reset_motors.py --hand_type right
Small practical note: the README uses --hand_type in the reset command and --hand-type in calibration. If argparse complains, run the specific script with --help and follow that script's argument spelling.
Calibration: Do Not Skip It
Tendon-driven hands are build-specific. Cable tension, friction, knots, routing, printed part tolerance, and wear all change the mapping from motor command to joint angle. RUKA-v2 provides a calibration script to find two bounds:
- in-tension / fully open bound: the finger is open and the tendon has just become taut.
- fully curled bound: the joint reaches its safe mechanical curl limit.
Run:
python calibrate_motors.py --hand-type right
The script asks you to move each joint with the up/down keys, confirm the desired pose, and save motor limits to RUKA/motor_limits/<left|right>_<tension|curl>_limits.npy. Those limits are later used by ruka_hand/control/hand.py.
The controller uses a linear mapping:
p = p_min + c * theta / (theta_max - theta_min) * (p_max - p_min)

theta: desired joint angle
p: motor position command
c: scaling factor for friction, tendon effects, and detector underestimation
This is not a perfect physics model. The paper explicitly lists the linear assumption as a limitation. However, the measured results show that it is good enough for teleoperation and visual behavior cloning if calibration is careful. If your build is inaccurate, debug in this order: tendon routing, knot slip, motor direction, motor limit, then scaling factor.
Teleoperation and Demonstrations
RUKA-v2 supports a simple Mediapipe teleoperation script:
python teleop_mediapipe.py
It also provides controllers in ruka_hand/control/controller_retarget.py for Oculus/OpenTeach teleoperation. In the paper, RUKA-v2 is mounted on a 7-DOF Franka arm. OpenTeach maps Oculus headset motion to the Franka end-effector through inverse kinematics, while hand poses pass through the retargeting and controller pipeline to produce RUKA-v2 motor commands.
The retargeting module follows AnyTeleop's vector-based approach. Instead of only matching fingertip positions, it optimizes robot joint angles so that robot link vectors align with human finger directions. This works well for RUKA-v2 because its hand morphology is intentionally close to a human hand.
For policy learning, demonstrations need consistent logs:
| Item | Recommendation |
|---|---|
| Camera | Fixed RGB camera with a clear view of hand, object, and goal |
| Proprioception | 7-DOF arm state plus 16-DOF RUKA-v2 joint positions |
| Demos per task | The paper collected about 100 expert teleoperated demos per task |
| Noise | Gaussian noise in arm and hand joint states to create recovery behavior |
| Logging | Action, observation, timestamp, and success/failure metadata |
Training a Policy with BAKU
The paper uses BAKU to train autonomous visual behavior cloning policies for three tasks: pen grasping, music box opening, and bread pick-and-place. The model pipeline is:
RGB frame from fixed camera ---> ResNet-18 visual encoder --+
                                                            |
23-D proprioception ---------> MLP proprio encoder ---------+--> Transformer trunk
                                                            |
Learned action token ---------------------------------------+
                                                                  |
                                                                  v
                                                        Action-chunking head
                                                                  |
                                                                  v
                                                   Future robot action sequence
The observation space includes 23 proprioceptive values: 7-DOF Franka arm state and 16-DOF RUKA-v2 joint positions, plus an RGB stream from a fixed camera. The action head predicts a chunk of future actions, which tends to produce smoother control than predicting only one action per step.
A beginner-friendly workflow looks like this:
# 1. Collect teleoperated demonstrations.
# Store RGB, robot state, action, and success metadata for every episode.

# 2. Inspect dataset schema and replay a few episodes.
python tools/inspect_dataset.py --data ./data/ruka_pen_pickup

# 3. Train a visual BC policy in the BAKU submodule.
cd BAKU
python train.py task=ruka_pen_pickup data=../data/ruka_pen_pickup

# 4. Evaluate a checkpoint with video rollouts.
python eval.py checkpoint=./checkpoints/ruka_pen_pickup/best.pt
Steps 2-4 are a template for organizing the workflow; exact script names should follow the BAKU submodule README in the version you clone. The invariant is more important than the command name: training and inference must use the same camera pose, action normalization, proprioception ordering, and joint limits. Many real-world failures come from schema drift rather than the neural network itself.
Inference and Safe Rollout
Do not jump from a checkpoint directly to full-speed autonomous manipulation. Use three levels:
| Level | Goal | How to run |
|---|---|---|
| Dry run | Validate tensors and action ranges | No motor power; log predicted actions |
| Shadow mode | Compare policy actions against teleoperation | Power enabled but low speed and low-risk contact |
| Closed-loop rollout | Execute the real task | Conservative speed with emergency stop ready |
Minimal inference loop:
while robot.is_enabled():
    rgb = camera.read()
    arm_q = franka.get_joint_state()
    hand_q = ruka.get_joint_state()

    obs = {
        "rgb": rgb,
        "proprio": concat(arm_q, hand_q),
    }

    action_chunk = policy.predict(obs)

    for action in action_chunk:
        if safety_filter(action):
            robot.send_action(action)
        else:
            robot.stop()
            break
At minimum, your safety filter should:
- Clamp commands to calibrated joint limits
- Clamp per-step action deltas
- Stop when motor current or tendon load rises unexpectedly
- Stop when the object leaves the camera workspace
- Stop near wrist hard stops or risky poses
Reported Results
The headline results are useful benchmarks for your own build:
| Evaluation | Result |
|---|---|
| Compared with RUKA v1 | 51.3% lower mean completion time and 21.2% higher overall success rate in the user study |
| Teleoperation | 10 single-arm tasks and 3 bimanual tasks |
| Policy learning | 3 autonomous tasks: pen, music box, bread pick-and-place |
| Thermal endurance | 5 hours of continuous operation without thermal shutdown |
| Finger DIP-PIP payload | 1200 g for 15 s |
| Non-thumb MCP payload | 780 g for 15 s |
| Thumb payload | 835 g for 20 s |
| Wrist supination/pronation payload | 1215 g for 20 s |
| Controller accuracy | 8.26 degree average joint-angle error, 10.68% normalized error |
For policy rollouts, the paper evaluates 10 random initial positions per task, with 5 closed-loop rollouts per position. Results are reported on a 10-point scaled mean/std: pen picking at 5.4 +/- 3.1 / 10, music box opening at 5.8 +/- 3.8 / 10, and bread pick-and-place at 5.6 +/- 2.9 / 10. This does not mean the tasks are solved. It shows that the platform can produce real demonstrations and train real autonomous policies, not only teleoperation videos.
Beginner Failure Modes
| Symptom | Likely cause | Fix |
|---|---|---|
| Finger does not fully open | Tendon is still too tight at the open bound | Recalibrate the in-tension bound |
| Finger does not fully curl | Knot slip, loose pulley, or high tendon friction | Inspect knot, pulley, PTFE tube, and route |
| Wrist motion curls fingers | Tendons are not routed near the wrist center or are stuck in the routing plate | Reopen wrist and inspect tendon paths |
| Motor heats quickly | Current limit too high, tendon overtightened, joint binding | Reduce current, remove tendon tension, test mechanics |
| Policy works in training but fails on hardware | Camera pose changed, joint order changed, normalization mismatch | Freeze camera, version your schema, replay dataset |
Sources
- Project page: ruka-hand-v2.github.io
- Paper: arXiv:2603.26660
- Code: GitHub ruka-hand-v2/RUKA-v2
- Assembly docs: RUKA-V2 GitBook