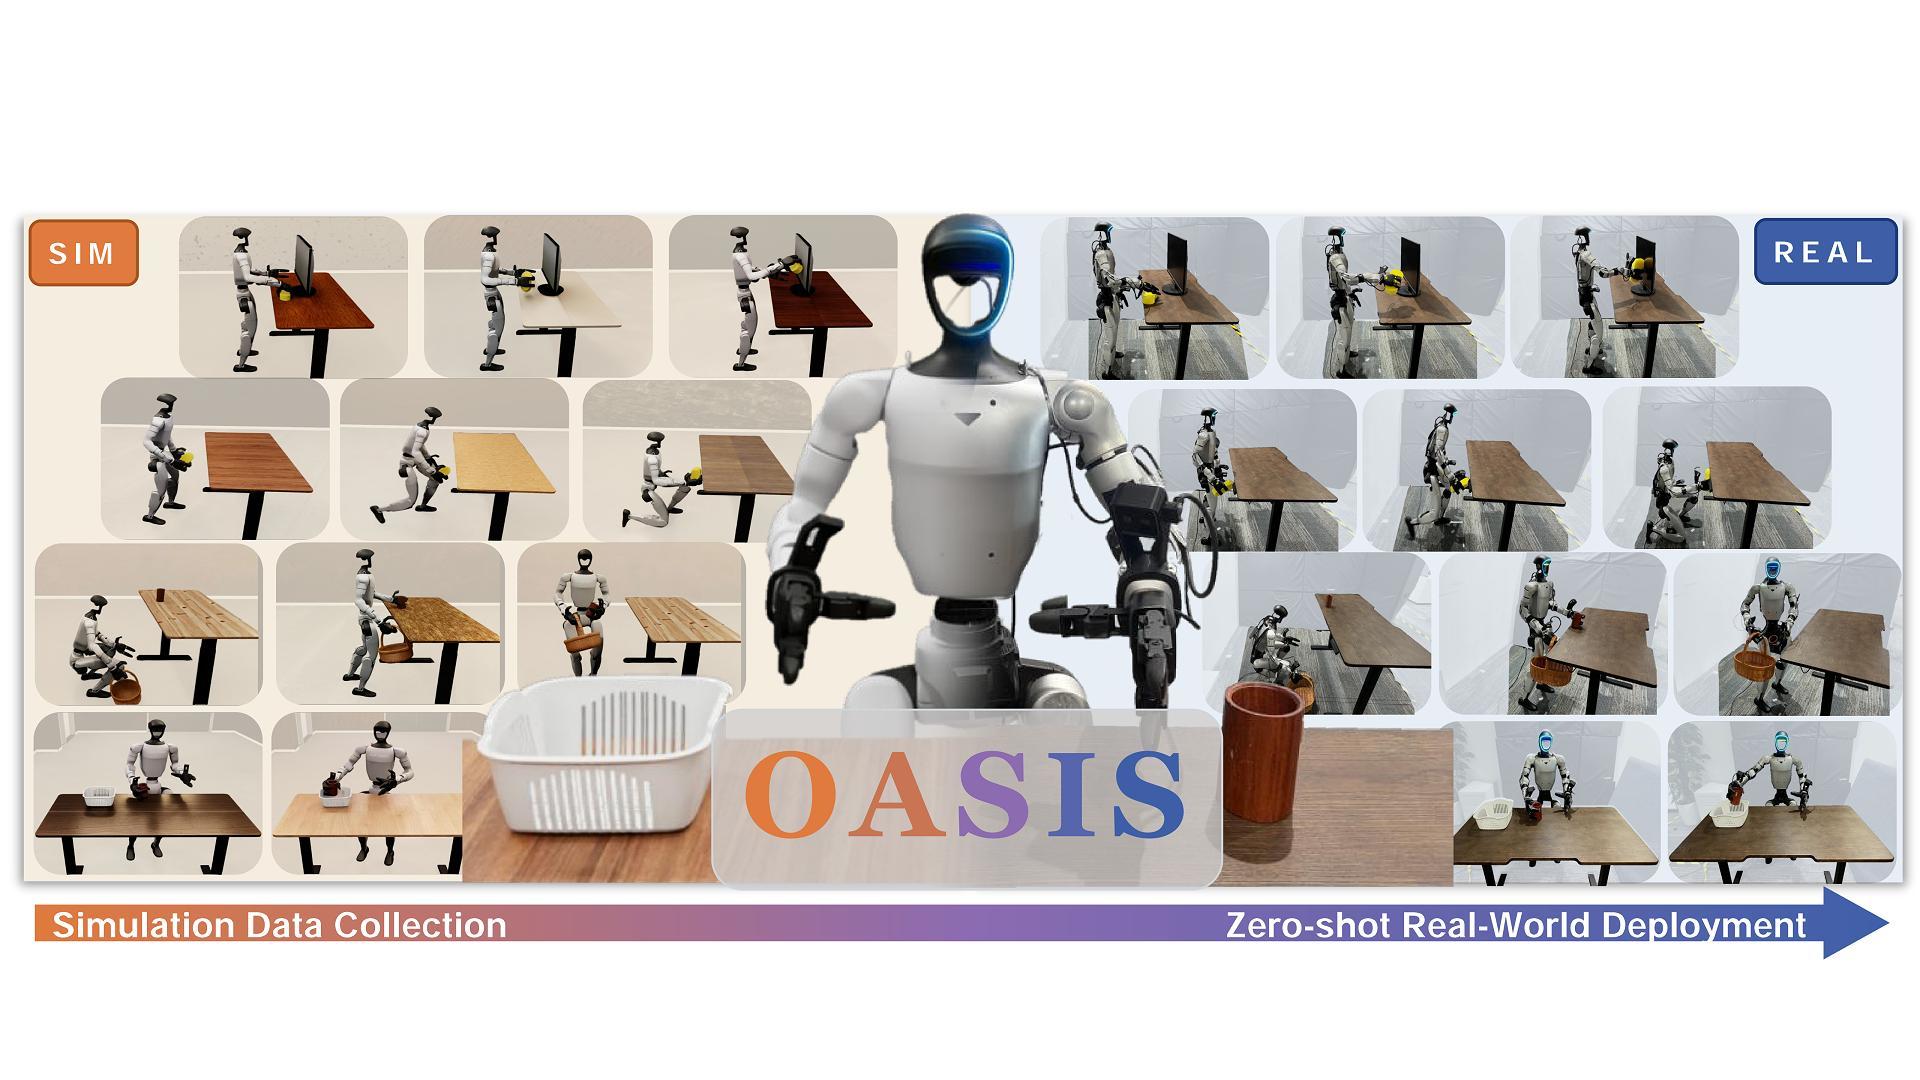
OASIS is one of the most relevant humanoid papers released this week: OASIS: From Simulation Data Collection to Real-World Humanoid Loco-Manipulation, posted to arXiv on June 7, 2026. The authors from TeleAI, Fudan University, East China University of Science and Technology, and Shanghai Jiao Tong University propose a pipeline that collects data entirely in simulation, trains a whole-body visuomotor policy, and deploys it zero-shot on a real Unitree G1 humanoid.
The important point is not simply "train in sim." The practical unlock is how OASIS splits the pipeline into two jobs. The human operator teleoperates in Isaac Lab with lightweight rendering to keep latency low. Later, the recorded state trajectories are replayed offline with high-quality PathTracing, domain randomization, and camera perturbations. One teleoperated trajectory can therefore become many visually different training samples without asking the operator to repeat the same task again and again.
This article is a practical beginner-friendly guide for readers who already know basic Python/Linux: read the paper, understand the architecture, install the repo, collect simulation data in Isaac Lab, replay trajectories, prepare training, run inference, and reason about zero-shot sim-to-real deployment. If you have been following Isaac Lab, humanoid loco-manipulation, or WholeBodyVLA sim-to-real workflows, OASIS is a very concrete case study.
Primary sources
Before running commands, open the original sources:
| Source | Link | Why read it |
|---|---|---|
| arXiv paper | arxiv.org/abs/2606.08548 | Core idea, architecture, experiments, ablations |
| Project page | oasis-humanoid.github.io | Videos, overview figures, real-robot demos |
| GitHub repo | github.com/TeleHuman/OASIS | Data collection code, assets, play/record/replay scripts |
At the time of writing, the public OASIS repo contains data collection code, assets, and the paper. The most directly reproducible pieces are simulation scenes, VR teleoperation, trajectory recording, and offline replay with domain randomization. The policy training described in the paper still requires either the authors' training stack or your own implementation based on the architecture. This guide will keep that distinction explicit:
- Available in the repo: install OASIS, run Isaac Lab scenes, teleoperate, record, replay, and render data.
- Described by the paper: the high-level Flow Matching planner, low-level whole-body controller, curriculum rollout, and zero-shot deployment.
What problem does OASIS solve?
Humanoid loco-manipulation means the robot must walk and manipulate objects at the same time. Examples from the paper include:
| Task | Why it is hard |
|---|---|
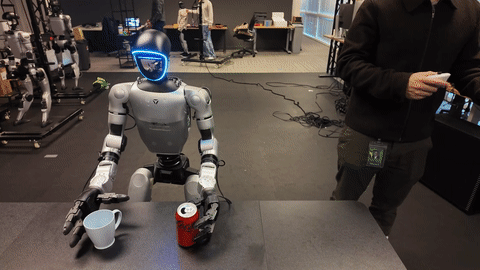
| Place Cup in Box | The robot must approach, align its body, reach, and place the cup accurately |
| Wipe Monitor | The arm must maintain stable contact while the body remains balanced |
| Lift Basket and Place Cup | Two arms and legs coordinate through multiple phases |
| Kneel and Wipe Under Table | The robot lowers its body, sees the target, and stays stable |
If you collect this data on a real humanoid, every small failure is expensive. The robot may fall, the object may move, the operator must stand the robot back up, reset the table, check cameras, and restart. With humanoids, reset cost is much higher than with tabletop robot arms. OASIS takes the opposite route: collect the trajectory in simulation, where reset is a command, assets can be duplicated, environments can be randomized, and data can scale without buying more real robots.
This is related to synthetic data for VLA models, but OASIS is more specific: it targets a whole-body humanoid policy. The dataset must contain locomotion, arm manipulation, head-camera observations, object states, and reference motion commands. That makes it different from pure locomotion training on terrain and also different from fixed-base manipulation. OASIS sits in the middle: the robot moves in order to manipulate.
The full pipeline
A simplified OASIS diagram:
Real object photo
    |
    v
Hunyuan3D mesh + texture generation
    |
    v
Qwen3-VL estimates dimensions + material
    |
    v
Physics-ready Isaac Lab scene
    |
    v
VR teleoperation in simulation, record state trajectory
    |
    v
Offline replay with PathTracing + domain randomization
    |
    v
Train hierarchical whole-body policy
    |
    v
Zero-shot deployment on a real Unitree G1
The pipeline has four main modules:
- Real-to-sim asset generation: Starting from real-object images, OASIS uses Hunyuan3D to create meshes and textures. Qwen3-VL then estimates dimensions, material, density, friction, and restitution at the category level.
- Simulation teleoperation: A human operator controls the humanoid in Isaac Lab from a first-person view using PICO 4U, handheld controllers, and ankle trackers.
- Offline rendering: Recorded trajectories are replayed with texture, lighting, and camera-extrinsics randomization. This is the main visual training data source.
- Hierarchical policy: A high-level planner predicts reference motion commands from multimodal observations. A low-level controller tracks those commands as target joint angles.
Machine setup
OASIS is built on Isaac Lab v2.1.0, Isaac Sim, and NVIDIA GPUs. Do not expect PathTracing replay to be practical on a laptop without an RTX GPU. A realistic starting point:
| Component | Recommendation |
|---|---|
| OS | Ubuntu 22.04 |
| GPU | NVIDIA RTX series, more VRAM is better |
| Driver/CUDA | Match the Isaac Sim requirements |
| Python | Dedicated Conda environment for Isaac Lab/OASIS |
| VR | PICO 4U if you want paper-style teleoperation |
| Disk | Hundreds of GB if you render many trajectories |
The repo also notes that the PC must be on the same network segment as the PICO headset, and xrobotoolkit-pc-service must be running before teleoperation. If your goal is only to learn the pipeline, start with play.sh and replay.sh using existing assets before adding VR.
Install Isaac Lab and OASIS
First install Isaac Lab v2.1.0 according to the official Isaac Lab guide. Once you have the IsaacLab folder, create the environment:
cd IsaacLab
./isaaclab.sh -c oasis
./isaaclab.sh -i
Then install OASIS:
git clone https://github.com/TeleHuman/OASIS.git
conda activate oasis
cd OASIS
pip install -e .
Download the object dataset and texture dataset from the Google Drive links in the repo README if you want to run the provided scenes. Place them under:
OASIS/
  assets/
    objects/
    textures/
If you build your own assets, start with a simple object: a cup, box, or sponge. Do not begin with thin, hollow, or highly articulated objects. Beginners often lose more time debugging collision meshes than debugging policies.
Generate your own asset from a real photo
The paper uses Hunyuan3D to generate mesh and texture from a real-object image, then uses Qwen3-VL to estimate physical attributes. In practice, you can begin manually:
- Photograph the object on a simple background with even lighting.
- Upload it to Hunyuan3D and export a
.glbfile. - Import the
.glbinto Isaac Sim through the Content Browser. - Add
Rigid Body with Colliders Preset. - Change collision approximation to
Convex Decomposition. - Save the asset as USD under
assets/objects/<object_name>/<object_name>.usd. - Check material texture paths so they do not break when folders move.
- Scale the object to real-world dimensions.
The README includes a UsdGeom.BBoxCache snippet for measuring the bounding box of a prim. The same idea is useful for checking scale:
import omni.usd
from pxr import Usd, UsdGeom

stage = omni.usd.get_context().get_stage()
prim = stage.GetPrimAtPath("/World")

bbox_cache = UsdGeom.BBoxCache(
    Usd.TimeCode.Default(),
    includedPurposes=[UsdGeom.Tokens.default_],
)
bbox = bbox_cache.ComputeWorldBound(prim)
rng = bbox.ComputeAlignedRange()
mn, mx = rng.GetMin(), rng.GetMax()

print("size meters:", mx[0] - mn[0], mx[1] - mn[1], mx[2] - mn[2])
For contact-rich simulation, a 20-30% scale error can teach the wrong behavior. A cup that is too light flies away, a basket that is too heavy overwhelms the controller, and incorrect friction makes wiping or grasping unreliable.
Preview the scene
Once installation is done, run visual mode:
conda activate oasis
sh play.sh
The goal here is not data collection. The goal is to check:
- Isaac Sim opens the scene without errors.
- Unitree G1 loads in the expected pose.
- Objects appear in the expected positions.
- Head camera or wrist cameras are not black.
- Assets do not fall through the table or explode physically.
- FPS is usable before VR teleoperation.
If the scene fails, do not tune the policy yet. Fix asset paths, USD references, material paths, scale, and collision first. In the OASIS pipeline, a clean scene is the first requirement for clean data.
Record trajectories with VR teleoperation
After installing the PICO SDK and GMR, open XRoboToolkit on the PICO headset, read the IP address, then set the pico_host field in play.sh and record.sh. The PC and PICO must share the same network segment. Before recording, start the PC service:
xrobotoolkit-pc-service
Then open two terminals. Terminal one records in headless mode:
conda activate oasis
sh record.sh
Terminal two runs teleoperation:
conda activate gmr
sh teleop.sh
In record mode, the robot head-camera stream from Isaac Sim is sent to the PICO. In the PICO UI, click Listen under Remote Vision. The controller mapping from the README is:
| Button | Function |
|---|---|
| X | Start recording |
| Y | End and save data |
| A | Reset environment and discard current recording |
| B | Switch first-person display mode |
| Left/Right Trig | Close left/right hand |
| Left/Right Grip | Open left/right hand |
Practical advice: record short, clean, rhythmic demonstrations. A good 20-second trajectory is often more valuable than a two-minute trajectory full of waiting, object drift, or corrective movements. For beginners, break each task into phases:
approach -> align body -> reach -> contact/grasp -> move object -> release -> recover posture
OASIS needs more than hand poses. It needs the body, feet, object states, and camera observations. Teleoperate as if you were teaching a real humanoid: footsteps should make sense, torso motion should be smooth, hands should not pass through objects, and the task should end with the robot still balanced.
Offline replay and domain randomization
After recording, use replay.sh to render the trajectories:
sh replay.sh
Inside replay.sh, configure:
input_dir=/path/to/recorded_trajectories
output_dir=/path/to/rendered_dataset
start=0
end=100
target_envs_per_episode=8
Meaning:
input_dir: the recorded state trajectories.output_dir: where rendered images/actions/states will be saved.start,end: sequence range to replay.target_envs_per_episode: how many rendered variants to produce per trajectory.
The paper randomizes three main groups:
| Randomization group | Examples |
|---|---|
| Background material | Wall, floor, table textures, roughness, metallic constant, UV transforms |
| Lighting | Dome light intensity, color temperature, RGB, indoor lights |
| Camera extrinsics | Position offsets and roll/pitch/yaw offsets |
This is where OASIS gains leverage over real-robot teleoperation. Real data can be physically accurate, but it is often visually narrow: the same room, same lights, same camera pose. OASIS can render the same behavior under many visual conditions. For image-conditioned policies, visual diversity can matter more than adding a few nearly identical real trajectories.
A dataset format that is easy to debug
A practical layout:
dataset/
  task_place_cup_box/
    seq_000001/
      obs_head_rgb/
      obs_wrist_left_rgb/
      obs_wrist_right_rgb/
      proprio.npy
      object_state.npy
      action.npy
      meta.json
    seq_000002/
      ...
The meta.json file should record:
{
  "task": "place_cup_in_box",
  "robot": "unitree_g1",
  "sim": "isaac_lab_2.1.0",
  "render": "path_tracing",
  "randomization": {
    "texture": true,
    "lighting": true,
    "camera_extrinsics": true
  }
}
When training fails, you need to trace whether the problem came from the operator, renderer, camera transform, action alignment, or controller. Good metadata saves hours.
OASIS policy architecture
OASIS uses a hierarchical architecture:
RGB + proprioception + task context
    |
    v
High-level Flow Matching planner
    |
    v
Reference motion command
    |
    v
Low-level whole-body controller
    |
    v
Target joint angles
    |
    v
PD / robot control loop
The high-level planner predicts reference motion commands from observations. The low-level controller converts those commands into target joint angles in a closed loop. This split matters. If one end-to-end network has to output every G1 joint angle directly from images, the problem becomes much harder and far more sensitive to latency. The hierarchical design keeps vision and task reasoning at the high level, while balance and whole-body tracking stay at the low level.
You can think of the high-level planner as answering: "what should the body and hands do over the next short horizon?" The low-level controller answers: "how do the joints track that reference without falling?"
Training recipe for beginners
If you implement your own trainer from the paper, start with behavior cloning before full Flow Matching. The goal is not to reproduce the paper immediately. The goal is to verify dataset and action alignment.
Pseudo-code:
for batch in dataloader:
    images = batch["head_rgb"]          # B, T, C, H, W
    proprio = batch["proprio"]          # B, T, Dp
    task = batch["task_embedding"]      # B, Dt
    target = batch["ref_motion"]        # B, T, Dr

    pred = high_level_policy(images, proprio, task)
    loss_bc = mse_loss(pred, target)

    optimizer.zero_grad()
    loss_bc.backward()
    optimizer.step()
Once BC behaves reasonably, move to Flow Matching. The simple intuition: the model learns a vector field that transports noise toward the action/reference distribution. For long-horizon loco-manipulation, Flow Matching can be better than one-step regression because it can represent multiple valid trajectories.
A practical training checklist:
| Step | Debug target |
|---|---|
| Train on 1 task, 10 trajectories | Loss decreases and rollout does not explode |
| Train on 1 task, many randomizations | Policy becomes less background-dependent |
| Add camera perturbation | Robot tolerates small camera offsets |
| Add multiple tasks | Check task embedding or instruction handling |
| Add curriculum rollout | Reduce compounding errors in long rollouts |
The paper includes a curriculum-rollout ablation. Without rollout, success on the four tasks is very low. With rollout, performance rises strongly, including 8/10 for Place Cup in Box, 7/10 for Wipe Monitor, 8/10 for Lift Basket and Place Cup, and 10/10 for Kneel and Wipe Under Table. The lesson is clear: pure teacher forcing on ground-truth history is not enough for long horizons. At deployment time, the policy must survive its own small mistakes.
Inference in simulation
Before deploying to hardware, run inference in Isaac Lab or a replay scene:
load checkpoint
load low-level controller
reset scene
while not done:
    rgb = read_head_camera()
    proprio = read_robot_state()
    ref = high_level_policy(rgb, proprio, task)
    q_target = low_level_controller(ref, proprio)
    send_to_pd(q_target)
Log at least:
- The RGB frame seen by the policy.
- The normalized proprioception vector.
- The predicted reference motion command.
- Target joint angles.
- Object pose.
- Per-phase success/failure state.
If simulation rollout fails, compare video side by side with the demonstration. The usual causes are:
- Image normalization differs between training and inference.
- Camera extrinsics in inference do not match the dataset.
- Actions are shifted by one or more timesteps relative to observations.
- The low-level controller cannot track the reference due to scale or joint-order mismatch.
Zero-shot deployment on Unitree G1
Zero-shot does not mean "no preparation." It means the high-level policy is trained on simulation data and not fine-tuned on real-robot data for that task. The real robot stack still has to match simulation:
| Item | Check |
|---|---|
| Joint order | Policy joint order matches the robot SDK |
| Control frequency | Policy/control loop has no jitter |
| Camera pose | Head-camera extrinsic is close to simulation |
| Latency | RGB and proprioception timestamps are aligned |
| Safety | E-stop, torque limits, fall detection |
| Workspace | Real objects match the simulated assets |
Do not begin with the hardest task. Use a safety ladder:
stand still -> arm motion only -> reach without contact -> contact with soft object -> full task at slow speed -> full task normal speed
OASIS reports that policies trained on simulation data can match or outperform policies trained on real-robot teleoperation data under the same trajectory budget on several zero-shot tasks. The main reason is the broad lighting and environmental variation produced during rendering. This is an important result: for humanoids, simulation is not only a locomotion training tool. It can become a source of whole-body manipulation data if assets, cameras, and domain randomization are handled carefully.
Common beginner mistakes
Beautiful asset, broken physics. A visually accurate mesh does not guarantee stable contact. For manipulation, simple, stable, correctly scaled collision is often more important than visual detail.
Recording demonstrations that are too long. Long noisy trajectories produce noisy datasets. Record many short, clean trajectories with clear phases.
Randomizing too aggressively too early. If camera offsets or lighting variation are extreme, the policy has to learn robustness before it learns the task. Start mild, then increase.
Not saving seeds and metadata. When a rendered trajectory fails, you need to know which randomization caused it.
Confusing zero-shot with zero-validation. You still need validation across scenes, lighting conditions, and camera poses before touching the real robot.
Results and why they matter
The paper evaluates OASIS on a real Unitree G1 across four loco-manipulation tasks. The key result is that simulation data from OASIS enables zero-shot deployment and, in many cases, performs better than policies trained from real teleoperation data with the same trajectory budget. The ablations also show that domain randomization and curriculum rollout are not minor details; they are central to the method.
For a small robotics team, the practical implication is significant: you do not necessarily need a large lab with many humanoids to start building a whole-body dataset. You can use Isaac Lab to construct scenes, teleoperate in simulation, replay offline, and train policies. The hard parts remain hard - low-level control, latency, safety, camera calibration - but the data bottleneck begins to shift from "we need many real robots" to "we need a clean simulation data engine."
For VLA and WholeBodyVLA work, OASIS suggests a very pragmatic data strategy: do not rely only on web videos, and do not rely only on expensive RL reward engineering. Use simulation teleoperation to produce embodiment-aligned trajectories, then scale them through rendering.