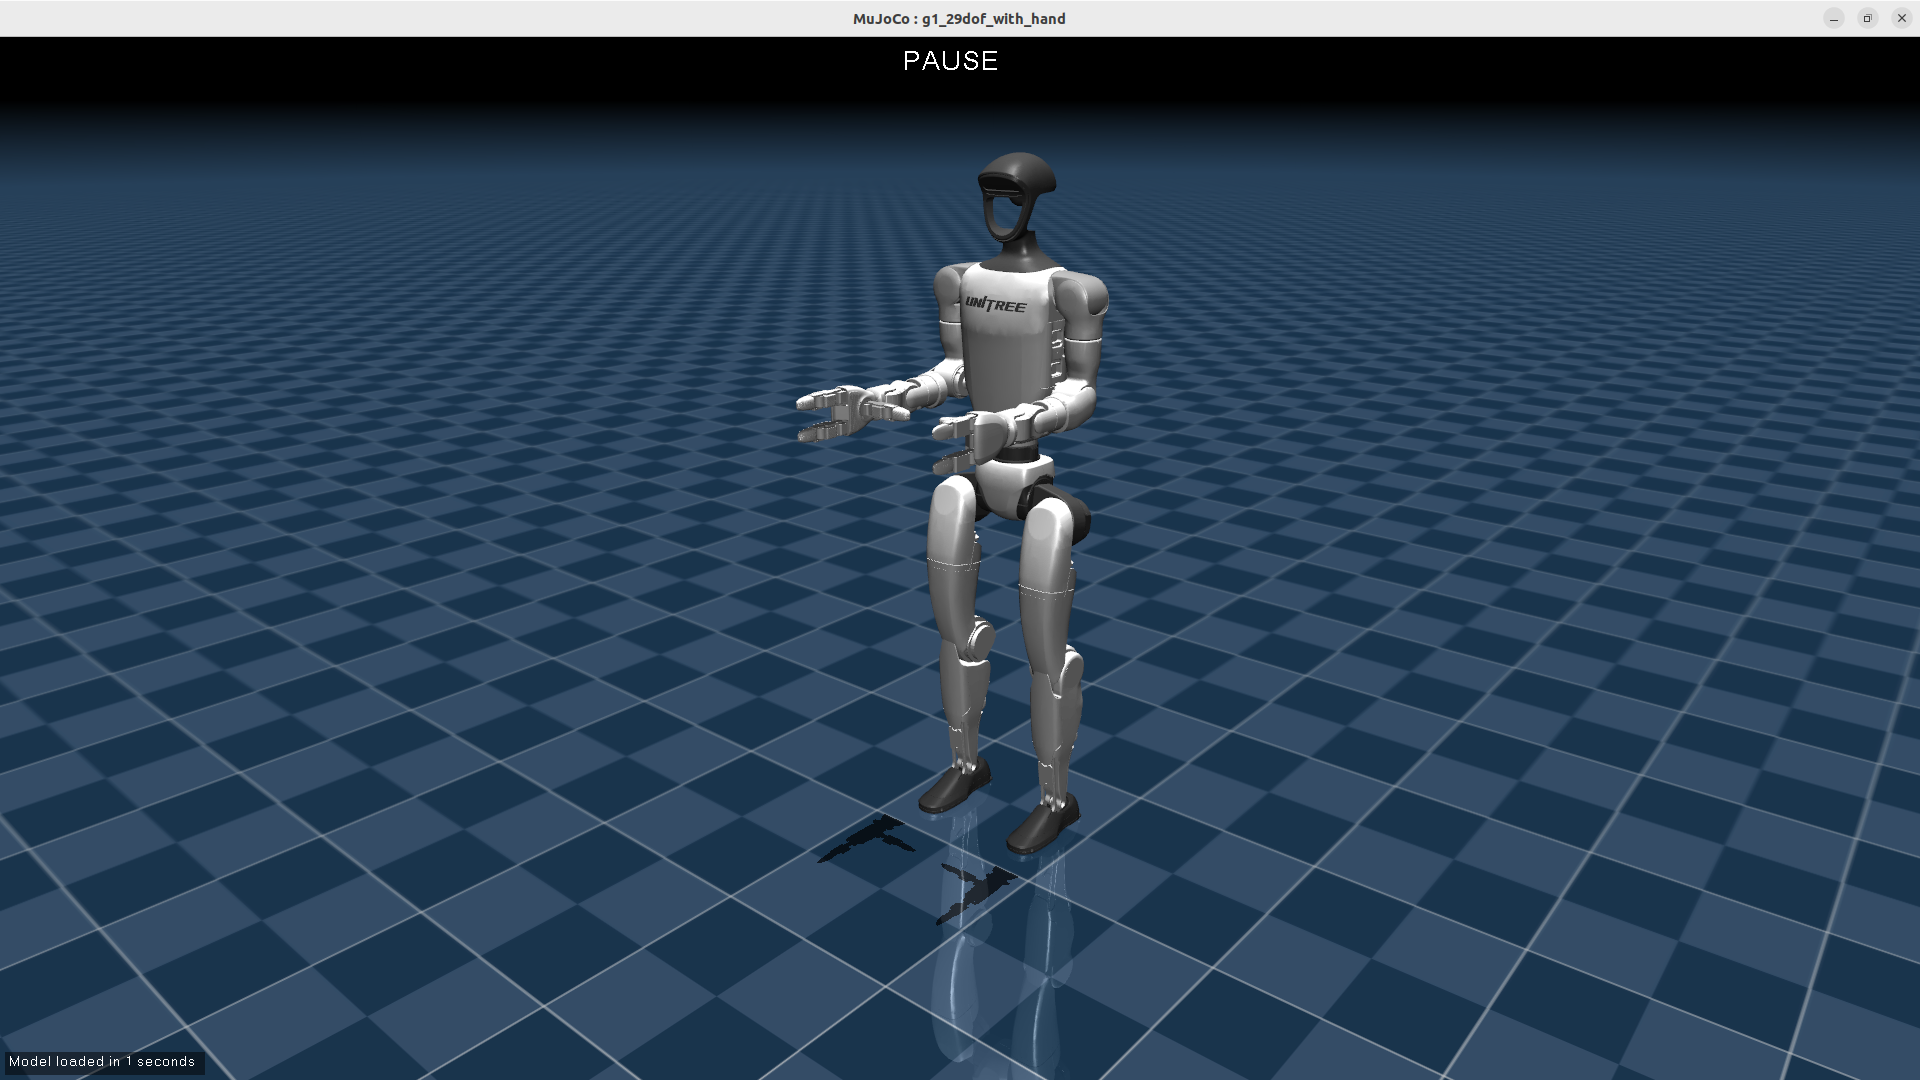
Why Part 2 starts with MCAP
In Part 1, we brought up Unitree G1 in MuJoCo through SDK2 DDS: robot scene, DDS domain, network interface, low-level topics, and the LowCmd/LowState mental model. That is the right foundation for control, but a simulator viewer is not enough when you need to debug a long humanoid motion. You need a timestamped log, a reproducible 3D view, and a file you can replay after the simulator is closed. This is where MCAP + Foxglove fits.
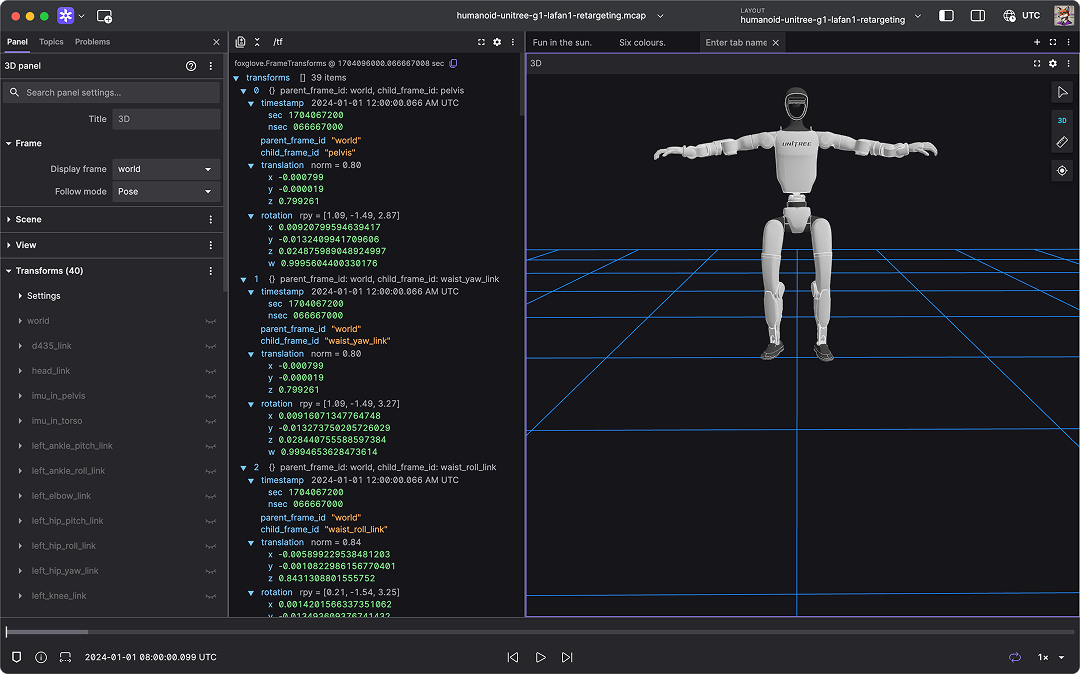
This article dissects the Foxglove tutorial script datasets/lafan1/LAFAN1_MCAP_WORKING.py. The script reads joints_labeled.csv, loads a G1 URDF, uses URDF.link_fk() to compute forward kinematics, wraps all link poses in a Foxglove FrameTransforms protobuf message, and writes one /tf message per frame using mcap_writer.write_message(topic="/tf"). The output is pose_data.mcap, which you can drag into Foxglove and replay as a robotics log.
If you are new to MuJoCo and robot models, read Getting Started with MuJoCo first. If your longer-term goal is motion tracking or sim-to-real policy deployment, Running GR00T-VisualSim2Real on G1 gives a broader view of how reference motions can become policy training targets.
Series roadmap
The G1 MuJoCo: Control, Foxglove and PlotJuggler series has six parts:
| Part | Article | Main focus |
|---|---|---|
| 1 | Bring Up G1 MuJoCo with Low-Level DDS | Unitree MuJoCo configuration, DDS domain/interface, joystick, and real topics/messages |
| 2 | Convert LAFAN1 G1 Motions to Foxglove MCAP | Convert joints_labeled.csv into /tf MCAP for kinematic playback |
| 3 | PlotJuggler for G1 Signals | Plot joint position, velocity, torque, IMU, command tracking, and delay |
| 4 | WBID and PD for G1 in MuJoCo | Design low-level control loops, gains, saturation, and stability checks |
| 5 | Upper-Body IK for G1 | Control arms and upper body, map joint indices, and check command safety |
| 6 | Sim-to-Real Checklist | Align simulation and hardware: domain, network, gains, timing, and safety |
This part does not implement a controller. It builds the offline data path. In Part 3, the same timing discipline will help us inspect numeric signals. In Part 4, the same idea of timestamped reference motion will help us compare desired motion against low-level MuJoCo DDS state.
What is inside the LAFAN1 G1 CSV?
The Foxglove tutorial uses a Unitree LAFAN1 retargeting dataset. Instead of camera images, point clouds, or torque measurements, the core demo file is a pose CSV. Each row represents one frame of a retargeted G1 motion.
Conceptually, each row has these groups:
| Column group | Meaning | How the script uses it |
|---|---|---|
Frame |
Frame index | Creates time using frame_idx / RATE_HZ |
X, Y, Z |
Pelvis position in world | Builds the floating-base translation |
QX, QY, QZ, QW |
Pelvis quaternion | Builds the floating-base rotation matrix |
| Joint columns | G1 joint angles in radians | Passed into URDF.link_fk(cfg=joint_positions) |
There is one small but important indexing detail. Dataset descriptions often summarize the row as "7 floating pelvis pose columns and 30 joint angle columns." The current joints_labeled.csv in the Foxglove tutorials repository has this header shape:
Frame,X,Y,Z,QX,QY,QZ,QW,left_hip_pitch_joint,...,right_wrist_yaw_joint
That file has 37 total columns: 1 Frame column, 7 pelvis pose columns, and 29 joint columns for the G1 29DoF model. The script uses columns = list(df.columns)[8:37], which selects column indices 8 through 36. If your downloaded dataset variant really has 30 joint columns, do not guess the index range by memory. Print the header:
df = pd.read_csv(CSV_FILE, nrows=0)
columns = list(df.columns)[8:]
print(len(columns))
print(columns)
The safe rule is: map by CSV header, not by memory. This is why the script creates JOINT_NAME_TO_CSV_INDEX instead of manually writing left_hip_pitch_joint = row[8], left_hip_roll_joint = row[9], and so on.

Configuration variables
The top of LAFAN1_MCAP_WORKING.py defines the variables that control the whole conversion:
BASE_TIME = datetime.datetime(2024, 1, 1, 0, 0, 0)
MCAP_FILE = "pose_data.mcap"
CSV_FILE = "LAFAN1_Retargeting_Dataset/joints_labeled.csv"
URDF_FILE = "LAFAN1_Retargeting_Dataset/robot_description/g1/g1_29dof_rev_1_0.urdf"
RATE_HZ = 30.0
CSV_FILE is the motion source. URDF_FILE is the kinematic model: links, joints, joint axes, and fixed origins. MCAP_FILE is the output. RATE_HZ = 30.0 means the motion is sampled at 30 frames per second, so frame 0 is at BASE_TIME, frame 1 is at BASE_TIME + 1/30 seconds, and frame 30 is at BASE_TIME + 1 second.
BASE_TIME does not need to be the real recording time. MCAP needs Unix-nanosecond timestamps so playback knows message order and spacing. For offline kinematics, a stable fake base time is fine. What matters is that every frame is separated by exactly 1 / RATE_HZ. If you used datetime.now() inside the conversion loop, playback timing would depend on conversion speed rather than the dataset frame rate.
A beginner-friendly directory layout is:
lafan1_work/
  LAFAN1_MCAP_WORKING.py
  LAFAN1_Retargeting_Dataset/
    joints_labeled.csv
    robot_description/
      g1/
        g1_29dof_rev_1_0.urdf
Then run:
python -m venv .venv
source .venv/bin/activate
pip install numpy pandas urdfpy mcap-protobuf-support foxglove-schemas-protobuf
python LAFAN1_MCAP_WORKING.py
Package names can shift as the Foxglove Python ecosystem evolves, so check the tutorial repository if your environment differs. The conceptual dependencies are stable: an MCAP protobuf writer, Foxglove protobuf schemas, a URDF parser, pandas for the header, and numpy for 4x4 transforms.
JOINT_NAME_TO_CSV_INDEX: avoid index drift
The script builds the joint mapping from the CSV header:
df = pd.read_csv(CSV_FILE, nrows=0)
columns = list(df.columns)[8:37]
JOINT_NAME_TO_CSV_INDEX = {joint: i for i, joint in enumerate(columns, start=8)}
print(JOINT_NAME_TO_CSV_INDEX)
The resulting dictionary looks like:
{
  "left_hip_pitch_joint": 8,
  "left_hip_roll_joint": 9,
  "left_hip_yaw_joint": 10,
  ...
}
For each CSV row, the script uses this dictionary to build joint_positions:
joint_positions = {}
for joint_name, col_index in JOINT_NAME_TO_CSV_INDEX.items():
    if col_index < len(row):
        joint_positions[joint_name] = float(row[col_index])
    else:
        joint_positions[joint_name] = 0.0
URDF.link_fk() accepts cfg as a map from joint names to joint configuration values. That means CSV joint names must match the URDF joint names. If the CSV says left_hip_pitch_joint but the URDF says left_hip_pitch, that joint will not be configured the way you expect. If the Foxglove playback looks broken around one body part, inspect the CSV names, the URDF names, and the number of mapped columns.
A quick diagnostic is:
robot = URDF.load(URDF_FILE)
urdf_joint_names = {j.name for j in robot.joints}
csv_joint_names = set(JOINT_NAME_TO_CSV_INDEX.keys())

print("CSV not in URDF:", sorted(csv_joint_names - urdf_joint_names))
print("URDF not in CSV:", sorted(urdf_joint_names - csv_joint_names))
Not every URDF joint must appear in the CSV. A robot model can contain fixed joints or auxiliary mesh links. But every actuated joint you expect to animate must have a valid value in joint_positions.
FLOATING_ROOT_FROM_CSV: the pelvis moves through world
A URDF usually describes a kinematic tree rooted at a link such as pelvis. It tells you how the left hip is attached to the pelvis, how the knee is attached to the thigh, and how the ankle is attached to the shank. But a humanoid motion capture trajectory is not only a list of joint angles. The pelvis also moves through world: it translates forward, rises and falls, yaws, and tilts during steps.
The CSV stores that floating root in seven fields:
x, y, z = map(float, row[1:4])
qx, qy, qz, qw = map(float, row[4:8])
base_pose_4x4 = build_base_pose(x, y, z, qx, qy, qz, qw)
build_base_pose() creates a homogeneous transform:
[ R00 R01 R02 x ]
[ R10 R11 R12 y ]
[ R20 R21 R22 z ]
[  0   0   0  1 ]
The rotation block R comes from the pelvis quaternion. When FLOATING_ROOT_FROM_CSV = True, the script composes the pelvis pose with each link pose:
global_tf = base_pose_4x4 @ local_tf
Here local_tf is the transform returned by link_fk() in the URDF root frame. Multiplying by base_pose_4x4 moves that link into the world frame. If you skip this step, G1 may still swing its limbs correctly relative to the pelvis, but the whole robot will be pinned near the origin. You lose the global body motion that makes a walking or dancing sequence meaningful.
Set FLOATING_ROOT_FROM_CSV = False only if your model already has a true floating root joint and your FK call already returns world-frame poses. For this tutorial script, beginners should keep it True.
convert_csv_to_mcap(): the main loop
The main function is intentionally simple:
def convert_csv_to_mcap(csv_path, urdf_path, mcap_path):
    robot = URDF.load(urdf_path)
    with open(csv_path, "r") as csv_file, open(mcap_path, "wb") as out_file, Writer(out_file) as mcap_writer:
        csv_reader = csv.reader(csv_file)
        headers = next(csv_reader, None)
        for row in csv_reader:
            ...
The URDF is loaded once because the robot structure does not change from frame to frame. The CSV and MCAP files are then opened together. Writer(out_file) handles the MCAP protobuf channel and schema details, so the loop only needs to assemble messages and write them.
Inside the loop, the script computes time from the frame index:
frame_idx = int(row[0])
timestamp = BASE_TIME + datetime.timedelta(seconds=(frame_idx / RATE_HZ))
timestamp_ns = int(timestamp.timestamp() * 1e9)
proto_timestamp = Timestamp()
proto_timestamp.FromDatetime(timestamp)
There are two time representations. timestamp_ns is the integer nanosecond time used by MCAP metadata for log_time and publish_time. proto_timestamp is the protobuf field stored inside every FrameTransform. Beginners often keep one and forget the other. If MCAP metadata is correct but message timestamps are strange, panels can behave unexpectedly. If message timestamps are correct but log_time is inconsistent, the playback timeline may not be smooth.
URDF.link_fk(): from joint angles to link poses
After reading the pelvis pose and joint values, the script calls:
fk_poses = robot.link_fk(cfg=joint_positions)
In urdfpy, cfg is a mapping from joints or joint names to configuration values. The result is a mapping from Link objects to 4x4 pose matrices. This is the key kinematics step. You do not manually implement forward kinematics for 29 joints. You let the URDF parser traverse the link-joint tree and multiply the transforms in the correct order.
Think of the left leg chain:
pelvis
  -> left_hip_pitch_joint
  -> left_hip_roll_joint
  -> left_hip_yaw_joint
  -> left_knee_joint
  -> left_ankle_pitch_joint
  -> left_ankle_roll_joint
  -> left_foot
Each joint has a fixed origin from the URDF plus a changing joint value from the CSV. Forward kinematics composes the chain and returns the pose of each link. If the CSV values are radians but you treat them as degrees, the motion will be wildly wrong. If the pelvis quaternion is not normalized, the rotation matrix may drift. In a production converter, add a quaternion check:
norm = math.sqrt(qx*qx + qy*qy + qz*qz + qw*qw)
if abs(norm - 1.0) > 1e-3:
    qx, qy, qz, qw = qx/norm, qy/norm, qz/norm, qw/norm
Building FrameTransforms for /tf
Foxglove's FrameTransform schema represents a child frame pose inside a parent frame. Translation moves the child origin relative to the parent origin, and rotation defines the child orientation. FrameTransforms is an array of those transforms. The script creates one FrameTransforms message for each CSV frame:
frame_transforms = FrameTransforms()
for link_obj, mat in link_poses.items():
    child_frame_id = link_obj.name
    parent_frame_id = WORLD_FRAME_ID

    trans = mat[:3, 3]
    rot_mat = mat[:3, :3]
    q = rot_matrix_to_quat(rot_mat)

    ftransform = FrameTransform()
    ftransform.timestamp.CopyFrom(proto_timestamp)
    ftransform.child_frame_id = child_frame_id
    ftransform.parent_frame_id = parent_frame_id
    ftransform.translation.CopyFrom(Vector3(x=float(trans[0]), y=float(trans[1]), z=float(trans[2])))
    ftransform.rotation.CopyFrom(Quaternion(x=float(q[0]), y=float(q[1]), z=float(q[2]), w=float(q[3])))
    frame_transforms.transforms.append(ftransform)
The script uses a simple design: every link is parented to world. This is not the prettiest TF tree, but it works because every pose has already been converted into a global pose through base_pose_4x4 @ local_tf. If you want a topology-accurate TF tree, you need to build a child-to-parent map from robot.joints and write relative transforms between neighboring links. That is a useful extension, but it is more error-prone when you are first validating the motion.
mcap_writer.write_message(topic="/tf")
At the end of each frame, the script writes the message:
mcap_writer.write_message(
    topic="/tf",
    message=frame_transforms,
    log_time=timestamp_ns,
    publish_time=timestamp_ns,
)
topic="/tf" is the conventional place for transform messages in Foxglove and ROS-style workflows. message=frame_transforms stores all link poses for the current frame. log_time and publish_time are both set to timestamp_ns because this is offline conversion. There is no recorder latency to model. In a live DDS or ROS 2 logger, publish_time could represent when the producer created the message, while log_time could represent when the recorder received and wrote it.
When the script finishes, it prints that pose_data.mcap was created. Open Foxglove Desktop or the web app, drag in the MCAP, add a 3D panel, and inspect frames. If nothing appears, debug from the data path rather than from the renderer:
| Symptom | Common cause | Fix |
|---|---|---|
| Timeline plays but no frames appear | Wrong topic or schema | Inspect topics in Foxglove |
| Robot stays at the origin | Floating root was not applied | Use base_pose_4x4 @ local_tf |
| Limbs rotate incorrectly | CSV names and URDF names do not match, or radians were treated as degrees | Compare CSV joint names with URDF joint names |
| Playback is too fast or too slow | Wrong RATE_HZ |
Verify the original FPS, usually 30.0 |
| Frames appear but no mesh appears | The MCAP only contains /tf, not a model resource |
Use frames for kinematic debugging, or add model/scene messages separately |
Pipeline diagram
The complete script is a five-stage pipeline:
joints_labeled.csv
  Frame + pelvis XYZQ + joint angles
        |
        v
JOINT_NAME_TO_CSV_INDEX
  header -> joint name -> column index
        |
        v
URDF.link_fk(cfg=joint_positions)
  joint angles + URDF tree -> local link poses
        |
        v
FLOATING_ROOT_FROM_CSV
  world_T_pelvis @ pelvis_T_link -> world_T_link
        |
        v
MCAP /tf
  FrameTransforms -> pose_data.mcap -> Foxglove 3D panel
The value of MCAP is that it separates data from runtime. You do not need MuJoCo open, you do not need a DDS domain, and you do not need a controller running. A single pose_data.mcap file is enough to review the reference motion. That is exactly what you want before using the same motion as a target for PD, WBID, or reinforcement learning motion tracking.
Practice tasks
To make sure you understand the converter, do these small exercises:
- Print
len(JOINT_NAME_TO_CSV_INDEX)and the first and last five joint names. Confirm whether your file has 29 or 30 joint columns. - Convert only the first 100 frames with
if frame_idx > 100: break, then open the shorter MCAP in Foxglove. - Set
FLOATING_ROOT_FROM_CSV = False, convert again, and compare whether the robot is pinned near the origin. - Change
RATE_HZfrom30.0to15.0and observe that playback becomes twice as slow. - Add a quaternion norm check and warning if the norm differs from 1.0 by more than
1e-3.
After these exercises, you have learned something more general than this specific LAFAN1 file: how to read tabular motion data, map it onto a URDF, create timestamped frame transforms, and package the result as an MCAP log. That is the foundation for PlotJuggler in Part 3 and for reference-vs-state comparisons once we start controlling G1 in MuJoCo.
References
- Foxglove tutorial: Converting the LAFAN1 Retargeting dataset to MCAP
- Source code
LAFAN1_MCAP_WORKING.py - Foxglove
FrameTransformschema - Foxglove
FrameTransformsschema - MCAP Python protobuf writer guide
- urdfpy
URDF.link_fk()documentation