In the opening article of this series, we set the goal: build a classical robot arm controller from the ground up, close enough to industrial practice to cover robot models, forward kinematics, inverse kinematics, MoveJ, MoveL, jogging, trajectory generation, and motion planning. This article does not start with robotics math. It starts with the engineering foundation: a C++ project that builds cleanly with CMake, uses Eigen for linear algebra, has a demo executable, runs unit tests with GoogleTest, and keeps a separate Python environment for fast algorithm prototyping.
That foundation matters more than it may sound. Without a clean project layout, every later tutorial becomes a pile of one-off files: include paths break, tests are skipped, Python prototypes use conventions that do not match C++, and debugging turns into guessing. Robot controllers are especially sensitive to small inconsistencies: radians versus degrees, left-multiplied versus right-multiplied transforms, base frame versus tool frame, and joint vectors with the wrong ordering. A good skeleton lets us test one layer at a time.
![]()
What You Will Have
By the end, you will have an arm-controller/ directory with this structure:
arm-controller/
├── CMakeLists.txt
├── include/
│   └── arm_controller/
│       └── math.hpp
├── src/
│   ├── math.cpp
│   └── main.cpp
├── tests/
│   └── test_math.cpp
└── python/
    ├── requirements.txt
    └── prototype_fk.py
The C++ side will build three targets:
arm_controller: the library that will hold controller logic, kinematics, trajectory generation, and jogging code in later posts.app: a terminal demo executable for quick manual checks.arm_controller_tests: a GoogleTest binary that runs through CTest.
The Python side will use a local .venv with numpy, roboticstoolbox-python, spatialmath-python, and matplotlib. Python is our scratchpad: fast plots, quick forward-kinematics checks, numerical IK experiments, and reference values before we port the runtime path to C++.
Install the Toolchain on Ubuntu
On Ubuntu, install the compiler toolchain, CMake, Ninja, Eigen, and Python environment tools with apt:
sudo apt update
sudo apt install -y build-essential clang cmake ninja-build git libeigen3-dev python3 python3-venv python3-pip
build-essential gives you GCC, G++, make, and the basic headers needed to compile C and C++ code. clang is optional, but it is useful when you want another compiler to catch warnings GCC may not report. cmake generates the build system. ninja-build is a fast backend that works well with CMake. libeigen3-dev installs Eigen headers, usually under /usr/include/eigen3 on Ubuntu.
Check the versions:
gcc --version
g++ --version
clang++ --version
cmake --version
ninja --version
python3 --version
This series asks for CMake 3.16 or newer. Not every line in this tutorial strictly requires 3.16, but that version is a practical baseline: it is available on older but still common Ubuntu setups, it supports the target-based CMake workflow we want, and it works well with FetchContent and the cmake -S . -B build command style. Eigen itself can integrate with older CMake versions, but the controller project should not be written in an old global-CMake style.
If cmake --version reports something older than 3.16, upgrade Ubuntu, install CMake from Kitware's apt repository, or use the official binary release from cmake.org. For beginners, building CMake from source is usually unnecessary.
Why CMake and Eigen?
A C++ robot controller needs predictable performance, precise control over data layout, and a build that can move between laptops, CI machines, and robot PCs. CMake handles the build side: it generates Ninja, Make, Visual Studio, or Xcode projects; it manages include paths, compiler options, dependencies, and tests. The modern style is target-based. Instead of using global include_directories(), we attach includes and libraries to the exact target that needs them.
Eigen is a header-only C++ library for vectors, matrices, decompositions, and transforms. Classical robotics uses these constantly: VectorXd for joint states, Matrix4d or Isometry3d for poses, Jacobian matrices, pseudo-inverses, and interpolation. Eigen also exports a CMake target named Eigen3::Eigen, which means we can write target_link_libraries(... Eigen3::Eigen) instead of hardcoding /usr/include/eigen3.

The important rule is this: dependencies should flow through targets. If arm_controller uses Eigen in a public header, link Eigen as PUBLIC. If Eigen only appears in .cpp files, link it as PRIVATE. In the skeleton below, math.hpp includes Eigen, so Eigen3::Eigen must be a public dependency of the library.
Create the Directory Layout
Start with an empty directory:
mkdir -p arm-controller/include/arm_controller arm-controller/src arm-controller/tests arm-controller/python
cd arm-controller
We separate include/ and src/ so the public API is visible. Later posts will add headers such as robot_model.hpp, kinematics.hpp, trajectory.hpp, and jogging.hpp. Implementation files live in src/. The tests/ directory holds fast unit tests that do not require a robot. The python/ directory holds scripts and notebooks for plots and reference calculations.
Create the first public header:
// include/arm_controller/math.hpp
#pragma once

#include <Eigen/Dense>

namespace arm_controller {

Eigen::Vector3d addVectors(const Eigen::Vector3d& a, const Eigen::Vector3d& b);

double clamp(double value, double lower, double upper);

}  // namespace arm_controller
Create the implementation:
// src/math.cpp
#include "arm_controller/math.hpp"

#include <algorithm>

namespace arm_controller {

Eigen::Vector3d addVectors(const Eigen::Vector3d& a, const Eigen::Vector3d& b) {
    return a + b;
}

double clamp(double value, double lower, double upper) {
    return std::clamp(value, lower, upper);
}

}  // namespace arm_controller
Create a tiny demo app:
// src/main.cpp
#include "arm_controller/math.hpp"

#include <Eigen/Dense>
#include <iostream>

int main() {
    const Eigen::Vector3d q1(0.1, 0.2, 0.3);
    const Eigen::Vector3d q2(0.4, 0.5, 0.6);
    const Eigen::Vector3d q = arm_controller::addVectors(q1, q2);

    std::cout << "q = " << q.transpose() << '\n';
    std::cout << "clamp(1.5, 0.0, 1.0) = "
              << arm_controller::clamp(1.5, 0.0, 1.0) << '\n';

    return 0;
}
Create the first unit test:
// tests/test_math.cpp
#include "arm_controller/math.hpp"

#include <gtest/gtest.h>

TEST(MathTest, AddsEigenVectors) {
    const Eigen::Vector3d a(1.0, 2.0, 3.0);
    const Eigen::Vector3d b(4.0, 5.0, 6.0);

    const Eigen::Vector3d result = arm_controller::addVectors(a, b);

    EXPECT_DOUBLE_EQ(result.x(), 5.0);
    EXPECT_DOUBLE_EQ(result.y(), 7.0);
    EXPECT_DOUBLE_EQ(result.z(), 9.0);
}

TEST(MathTest, ClampsValueIntoRange) {
    EXPECT_DOUBLE_EQ(arm_controller::clamp(1.5, 0.0, 1.0), 1.0);
    EXPECT_DOUBLE_EQ(arm_controller::clamp(-0.2, 0.0, 1.0), 0.0);
    EXPECT_DOUBLE_EQ(arm_controller::clamp(0.4, 0.0, 1.0), 0.4);
}
This code is intentionally small, but it already exercises the pieces we need: a public header, a library, an executable, Eigen types, a namespace, and a test target.
Complete CMakeLists.txt
Place this CMakeLists.txt at the root of arm-controller/:
cmake_minimum_required(VERSION 3.16)

project(
    ArmController
    VERSION 0.1.0
    DESCRIPTION "Classical robot arm controller examples"
    LANGUAGES CXX
)

set(CMAKE_CXX_STANDARD 17)
set(CMAKE_CXX_STANDARD_REQUIRED ON)
set(CMAKE_CXX_EXTENSIONS OFF)

find_package(Eigen3 REQUIRED NO_MODULE)

add_library(arm_controller
    src/math.cpp
)

target_include_directories(arm_controller
    PUBLIC
        ${CMAKE_CURRENT_SOURCE_DIR}/include
)

target_link_libraries(arm_controller
    PUBLIC
        Eigen3::Eigen
)

target_compile_options(arm_controller
    PRIVATE
        -Wall
        -Wextra
        -Wpedantic
)

add_executable(app
    src/main.cpp
)

target_link_libraries(app
    PRIVATE
        arm_controller
)

include(FetchContent)

FetchContent_Declare(
    googletest
    URL https://github.com/google/googletest/archive/refs/tags/v1.14.0.zip
)

set(gtest_force_shared_crt ON CACHE BOOL "" FORCE)
FetchContent_MakeAvailable(googletest)

enable_testing()

add_executable(arm_controller_tests
    tests/test_math.cpp
)

target_link_libraries(arm_controller_tests
    PRIVATE
        arm_controller
        GTest::gtest_main
)

include(GoogleTest)
gtest_discover_tests(arm_controller_tests)
Line by line:
cmake_minimum_required(VERSION 3.16) sets the minimum CMake version and selects the corresponding policy behavior. Put this first. Setting it too low can force old behavior that makes dependency handling harder to reason about.
project(...) names the project, sets a version, adds a short description, and declares the language. LANGUAGES CXX tells CMake that we only need a C++ compiler for this project.
The three CMAKE_CXX_STANDARD lines request C++17, require the compiler to support it, and disable compiler-specific extensions such as gnu++17. A robot controller should build the same way across GCC, Clang, and CI, so the standard should be explicit.
find_package(Eigen3 REQUIRED NO_MODULE) asks CMake to find Eigen through the config package exported by Eigen. REQUIRED fails at configure time if Eigen is missing. NO_MODULE avoids old FindEigen3.cmake behavior. After this call succeeds, Eigen3::Eigen is available as an imported target.
add_library(arm_controller src/math.cpp) creates the main library. In later posts, this target will gain files such as robot_model.cpp, kinematics.cpp, trajectory.cpp, and jogging.cpp. Keeping the core logic in a library allows the app, tests, ROS2 nodes, and future bindings to share one implementation.
target_include_directories(arm_controller PUBLIC ${CMAKE_CURRENT_SOURCE_DIR}/include) exposes public headers. The PUBLIC scope means arm_controller needs this include path, and anything linking to arm_controller inherits it. That is why app can include "arm_controller/math.hpp" without declaring its own include path.
target_link_libraries(arm_controller PUBLIC Eigen3::Eigen) connects Eigen to the library. Because math.hpp includes <Eigen/Dense>, the dependency is part of the public interface. If you mark it PRIVATE, downstream targets may fail when they include the header.
target_compile_options(...) enables useful warnings for the library. Warnings catch unused variables, suspicious conversions, and sloppy signatures early. Later, you can make this compiler-specific with generator expressions, but the simple form is enough for the skeleton.
add_executable(app src/main.cpp) defines the demo binary. After building, the executable is created under the build directory.
target_link_libraries(app PRIVATE arm_controller) links the app against the controller library. The app consumes the library but does not expose it to other targets, so PRIVATE is the right scope.
include(FetchContent) loads CMake's dependency-fetching module. The CMake documentation describes FetchContent as a way to populate content during configure time so it can be used immediately by the build.
FetchContent_Declare(googletest ...) declares where GoogleTest comes from. The official GoogleTest CMake quickstart uses FetchContent as the beginner-friendly path. A real production project may pin a commit hash instead of a tag for stronger reproducibility; the tag is easier to read in a tutorial.
set(gtest_force_shared_crt ON CACHE BOOL "" FORCE) mainly matters on Windows, where it prevents runtime-library mismatch problems. It is harmless on Linux.
FetchContent_MakeAvailable(googletest) downloads and adds GoogleTest to the build. After this, GTest::gtest_main is available.
enable_testing() enables CTest for the project. Without it, ctest will not know about your tests.
add_executable(arm_controller_tests tests/test_math.cpp) builds the test binary. A GoogleTest test is still just a normal C++ executable.
target_link_libraries(arm_controller_tests PRIVATE arm_controller GTest::gtest_main) links the test to the code under test and to the GoogleTest main function.
include(GoogleTest) and gtest_discover_tests(arm_controller_tests) let CMake discover individual GoogleTest cases from the test binary. ctest can then show each test case instead of treating the whole binary as one opaque test.
Build Out of Source
Configure the project:
cmake -S . -B build -G Ninja
-S . says the source directory is the current directory, where CMakeLists.txt lives. -B build says generated build files should go into build/. This is an out-of-source build: generated files, object files, dependency downloads, and binaries stay out of your source tree.
If you do not want to use Ninja, omit the generator:
cmake -S . -B build
Build the project:
cmake --build build -j
cmake --build build calls the backend that CMake generated. If the backend is Ninja, CMake calls Ninja; if it is Make, CMake calls Make. The -j option enables parallel builds. This is more portable than directly calling make or ninja.
Run the demo:
./build/app
Expected output:
q = 0.5 0.7 0.9
clamp(1.5, 0.0, 1.0) = 1
Run the tests:
ctest --test-dir build --output-on-failure
If everything is correct, the test cases pass. If a test fails, --output-on-failure prints useful logs.
Debug and Release Builds
For single-config generators such as Ninja and Unix Makefiles, choose the build type during configuration:
cmake -S . -B build-debug -G Ninja -DCMAKE_BUILD_TYPE=Debug
cmake --build build-debug -j

cmake -S . -B build-release -G Ninja -DCMAKE_BUILD_TYPE=Release
cmake --build build-release -j
Separate build directories let you switch between debug and release without clearing CMake cache files. Debug includes symbols for gdb or lldb. Release enables optimization and is the right mode for benchmarking IK, trajectory generation, and servo loops.
Do not benchmark Eigen-heavy code in Debug mode. The slowdown can be dramatic, and you may reject a perfectly fine algorithm. Conversely, do not debug subtle logic only in Release mode if compiler optimization makes stack traces difficult to read.
Build the Python Environment
Python is not the runtime controller in this series. It is the lab bench. With NumPy and Robotics Toolbox for Python, you can test a forward-kinematics formula, plot a joint trajectory, experiment with damped least-squares IK, or compare transforms before you write the C++ implementation.
Create python/requirements.txt:
numpy
roboticstoolbox-python
spatialmath-python
matplotlib
Create and activate the virtual environment:
python3 -m venv .venv
source .venv/bin/activate
python -m pip install --upgrade pip
python -m pip install -r python/requirements.txt
The Python Packaging User Guide describes venv as a way to create an isolated Python installation. Once activated, python and pip in your shell point to .venv, so the robotics packages for this project do not pollute the system Python.
Create a small prototype:
# python/prototype_fk.py
import numpy as np
from spatialmath import SE3
import roboticstoolbox as rtb

def main() -> None:
    robot = rtb.models.DH.Puma560()
    q = np.array([0.0, -0.4, 0.3, 0.0, 0.2, 0.0])
    T = robot.fkine(q)

    print("q:", q)
    print("End-effector pose:")
    print(T)

    offset = SE3.Tx(0.05)
    print("Pose with 5 cm tool offset:")
    print(T * offset)

if __name__ == "__main__":
    main()
Run it:
python python/prototype_fk.py
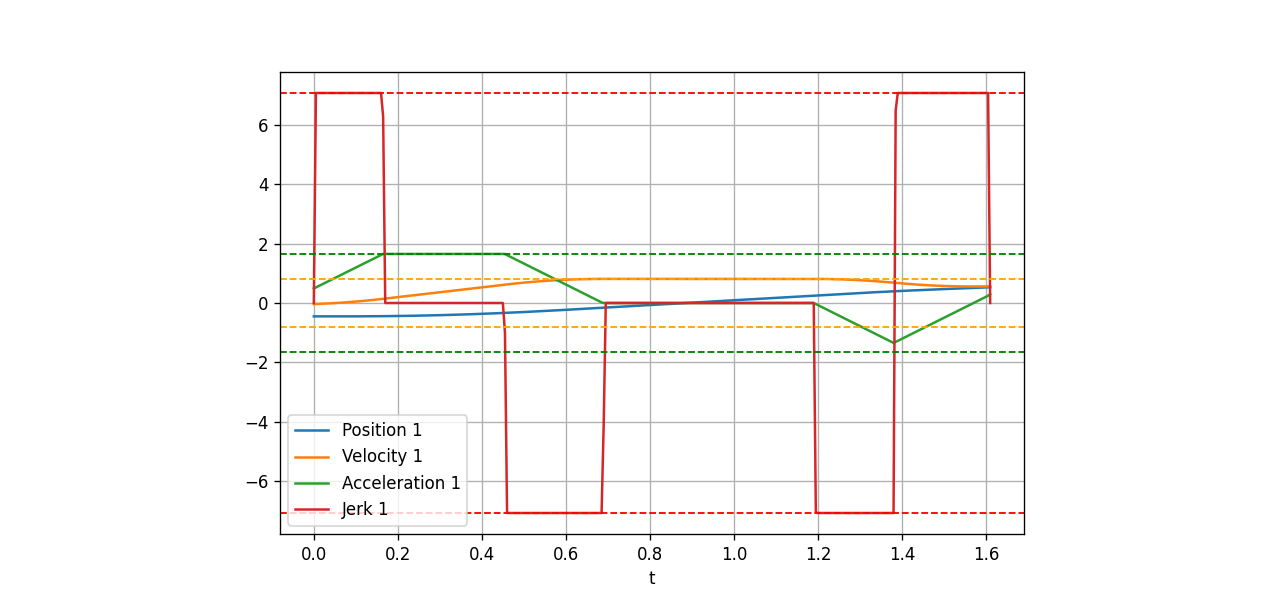
Later, we will use Python to generate reference data for C++. For example, Python can compute FK for a sample robot, and the C++ implementation must match within a tolerance such as 1e-9. For IK, Python helps visualize error per iteration. For trajectory generation, Python can plot position, velocity, acceleration, and jerk before the C++ profile generator is written.
Set Data Conventions Early
A project that builds is only the first step. The second step is choosing conventions and keeping them consistent:
| Item | Convention in this series |
|---|---|
| Joint angles | radians |
| Joint velocities | radians/second |
| Pose | Eigen::Isometry3d or a 4x4 matrix |
| Joint vector | Eigen::VectorXd for runtime DOF, Eigen::Matrix<double, 6, 1> for fixed 6-DOF examples |
| Header names | include/arm_controller/<module>.hpp |
| Namespace | arm_controller |
| Test tolerance | start with 1e-9 for simple math, relax when iterative numerical algorithms require it |
This table is not a side detail. Many robot bugs come from mixed conventions: URDF uses meters while one utility uses millimeters; the Python prototype returns a base-to-tool transform while the C++ solver interprets it as tool-to-base; a UI enters degrees while the solver expects radians. We define the rules now so later posts on robot models, FK/IK/Jacobians, and jogging servo loops can build on the same assumptions.
Troubleshooting Build Errors
If find_package(Eigen3 REQUIRED NO_MODULE) fails, check whether Ubuntu installed Eigen's CMake config:
dpkg -L libeigen3-dev | grep Eigen3Config.cmake
If there is no output, reinstall Eigen:
sudo apt install --reinstall libeigen3-dev
If GoogleTest fails to download, it is usually a network or proxy problem. Run configure again:
cmake -S . -B build -G Ninja
If you need offline builds, consider a submodule or a package manager such as vcpkg or Conan. This series uses FetchContent because it keeps the first project setup simple for beginners.
If #include "arm_controller/math.hpp" fails, check target_include_directories(arm_controller PUBLIC ...). Avoid fixing it by manually adding -I to a shell command. The CMake target should describe the include path correctly.
If ctest says there are no tests, check enable_testing() and gtest_discover_tests(...). You can also run:
ctest --test-dir build -N
The -N flag lists tests without executing them.
References
- CMake Tutorial
- CMake FetchContent
- Eigen: Using Eigen in CMake Projects
- GoogleTest Quickstart with CMake
- Python Packaging: venv and pip
- Robotics Toolbox for Python
Conclusion
You now have a serious enough skeleton for a robot arm controller: C++17, target-based CMake, Eigen through Eigen3::Eigen, a demo executable, GoogleTest through FetchContent, out-of-source builds, and a Python virtual environment for prototyping. The project is small, but it already has the shape of a codebase that can grow.
The next article will use this foundation to define the robot model: links, joints, limits, frame trees, transform chains, and the data structures needed before FK and IK become real code instead of isolated equations.