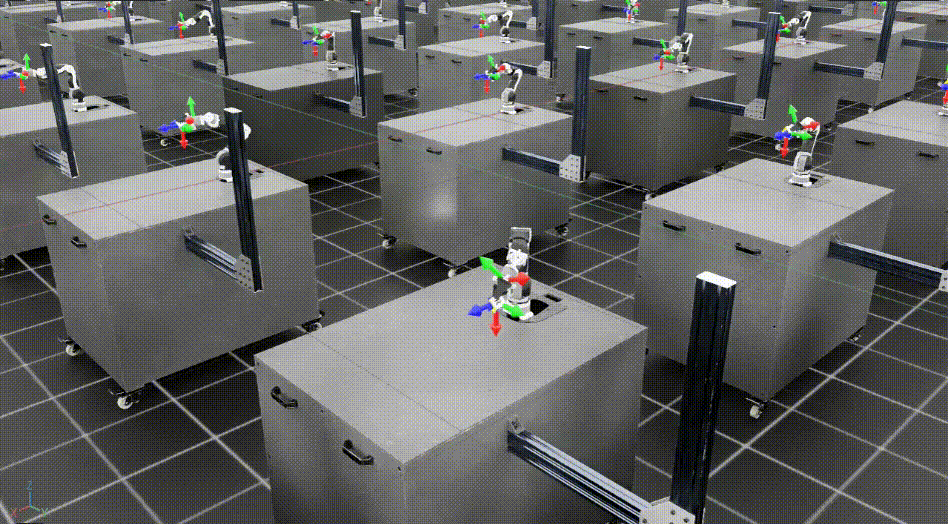
Sim-to-Real Transfer for OpenArm with SimpleVLA-RL
You now have a VLA policy trained with SimpleVLA-RL in Isaac Lab — SFT created the baseline, GRPO pushed the success rate higher. Now comes the most important and hardest step in the entire pipeline: transferring the model from simulation to the real robot. This is where every assumption about physics, visuals, and dynamics gets tested by reality.
This article provides a detailed walkthrough from setting up OpenArm hardware, building an inference server, mapping actions from sim to real, to techniques for reducing the sim-to-real gap. We will also review reference results from the SimpleVLA-RL paper on the Piper robot and analyze how they apply to OpenArm.
The Sim-to-Real Gap: Three Main Enemies
Before writing any code, let us understand why policies trained in simulation usually do not work perfectly on real robots. There are three main types of gap:
1. Visual Gap — Sim Eyes Differ from Real Eyes
Rendering in Isaac Lab, despite being quite good, still differs from real cameras. Lighting, shadows, textures, reflections — all different. A cardboard box in sim has a perfect surface, while a real box has wrinkles, labels, and uneven light reflections.
2. Dynamics Gap — Sim Physics Differs from Real Physics
Friction between the gripper and cardboard box in sim is modeled with simple mathematical formulas. In reality, friction depends on surface material, humidity, grip force, contact angle — countless factors that simulation cannot fully capture.
3. Action Gap — Sim Control Differs from Real Control
In sim, when you send joint_position = 1.57, the robot joint jumps to that position instantly (or follows a simple dynamic model). On a real robot, motors have inertia, backlash (mechanical play), and CAN bus communication delay — all creating differences between sim actions and real actions.

Step 1: Setup OpenArm Hardware
CAN Bus Connection
OpenArm uses the CAN bus protocol to communicate with servo motors. There are two ways to connect:
Option 1: Use openarm_can library (no LeRobot dependency)
# Install openarm_can — direct communication with OpenArm
pip install openarm-can

# Or clone from source
git clone https://github.com/OpenArm-org/openarm_can.git
cd openarm_can
pip install -e .
# Test connection
from openarm_can import OpenArmController

controller = OpenArmController(
    can_interface="can0",      # CAN bus interface
    baudrate=1000000,          # 1Mbps
)

# Check all servos respond
status = controller.ping_all()
print(f"Found {len(status)} servos: {status}")
# Expected: Found 8 servos: [1, 2, 3, 4, 5, 6, 7, 8]
Option 2: Use lerobot CLI for hardware setup only
# ONLY use for CAN setup — training is still SimpleVLA-RL
pip install lerobot

# Setup CAN interface
sudo ip link set can0 type can bitrate 1000000
sudo ip link set can0 up

# Verify
candump can0  # Should see CAN frames
Note: we use the LeRobot CLI only for CAN hardware setup because it has convenient ready-made scripts. All training and inference remains 100% SimpleVLA-RL pipeline.
Calibrate Joints
Calibration ensures the zero position of each joint in code corresponds to the real zero position on the robot:
from openarm_can import OpenArmController, Calibrator

controller = OpenArmController(can_interface="can0")
calibrator = Calibrator(controller)

# Step 1: Move robot to home position (arm straight up)
# Do this manually or with teach pendant
input("Move robot to home position then press Enter...")

# Step 2: Record offset for each joint
offsets = calibrator.calibrate()
print(f"Joint offsets: {offsets}")

# Step 3: Save calibration
calibrator.save("openarm_calibration.json")
Mount Camera
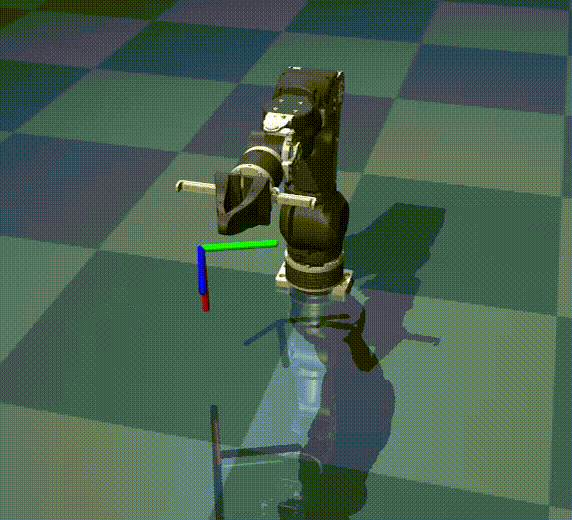
Camera position is an extremely important factor for sim-to-real. In sim, you placed the camera at a specific position — the real camera must be in a similar position:
# Camera parameters in Isaac Lab (from Part 9)
SIM_CAMERA = {
    "position": [0.5, 0.0, 1.2],   # x, y, z relative to base
    "target": [0.3, 0.0, 0.75],    # Look-at point (table center)
    "fov": 69,                      # Field of view (degrees)
    "resolution": [640, 480],       # Raw resolution
}

# On real robot: mount USB webcam at the same position
# Use a measuring tape to place camera:
# - 50cm in front of robot base
# - 120cm high (shoulder level of robot)
# - Pointing down at table, FOV ~69 degrees
# - Logitech C920 has 78 degree FOV -> zoom in slightly or crop
Tips for mounting camera:
- Use a tripod or fixed mount — camera shake will kill the policy
- Mark camera position on the table for reproducible setup next time
- Take screenshots from sim and real side by side to compare viewing angle
Step 2: Create the Inference Server
Instead of running the VLA model directly on the robot controller PC (usually weak), we create an inference server on a machine with a powerful GPU:
Architecture
+-----------------------------------------------------------+
|                    GPU Server                              |
|  +-----------------------------------------------------+  |
|  |  SimpleVLA-RL Inference                              |  |
|  |  (OpenVLA-OFT model loaded in GPU memory)            |  |
|  |  POST /predict -> {image} -> {action_8dof}           |  |
|  +-----------------------------------------------------+  |
+----------------------------+------------------------------+
                             | HTTP (LAN)
+----------------------------+------------------------------+
|                Robot Controller PC                         |
|  +--------------+    +----------------+    +------------+  |
|  | USB Camera   |--->| Control Loop   |--->| OpenArm    |  |
|  | (Logitech)   |    | (30 Hz)        |    | CAN Bus    |  |
|  +--------------+    +----------------+    +------------+  |
+-----------------------------------------------------------+
Inference Server Code
# inference_server.py — Run on GPU server
import torch
import numpy as np
from flask import Flask, request, jsonify
from PIL import Image
import io
import time

# Load SimpleVLA-RL checkpoint
from prismatic.models import load_vla_model

app = Flask(__name__)

# Global model — loaded once at server start
MODEL = None
DEVICE = "cuda:0"

def load_model(checkpoint_path):
    """Load trained SimpleVLA-RL model"""
    global MODEL
    print(f"Loading model from {checkpoint_path}...")
    MODEL = load_vla_model(
        checkpoint_path,
        device=DEVICE,
        use_flash_attn=True,
    )
    MODEL.eval()
    print("Model loaded successfully!")

@app.route("/predict", methods=["POST"])
def predict():
    """
    Receive image -> return 8-DoF action
    Input: multipart form with 'image' field (JPEG)
    Output: JSON {"action": [8 floats], "inference_ms": float}
    """
    start = time.time()

    # Read image from request
    image_file = request.files["image"]
    image = Image.open(io.BytesIO(image_file.read())).convert("RGB")
    image = image.resize((224, 224))  # Resize for VLA input

    # Task description — fixed for box grasping
    task = "Pick up the carton box from the table"

    # Inference
    with torch.no_grad():
        action = MODEL.predict_action(
            image=image,
            instruction=task,
            unnorm_key="openarm_box_grasp",  # Denormalize key
        )

    # action shape: (8,) — 7 joint positions + 1 gripper
    action_list = action.cpu().numpy().tolist()

    inference_ms = (time.time() - start) * 1000

    return jsonify({
        "action": action_list,
        "inference_ms": inference_ms,
    })

@app.route("/health", methods=["GET"])
def health():
    return jsonify({"status": "ok", "model_loaded": MODEL is not None})

if __name__ == "__main__":
    import sys
    checkpoint = sys.argv[1] if len(sys.argv) > 1 else "./checkpoints/openarm-rl-v1/best"
    load_model(checkpoint)
    app.run(host="0.0.0.0", port=5000, threaded=False)
Run the Server
# On GPU server
conda activate simplevla
python inference_server.py ./checkpoints/openarm-rl-v1/best

# Test
curl -X POST http://gpu-server:5000/predict \
    -F "image=@test_image.jpg"
# Expected: {"action": [0.12, -0.34, ...], "inference_ms": 45.2}
Inference time on a single A100 GPU is roughly 30-60ms — fast enough for a 10-30 Hz control loop.
Step 3: Action Mapping Sim to Real
This is the step many people skip and then wonder why the robot behaves strangely in the real world.
Joint Limit Clipping
Joint ranges in sim may differ from the actual physical limits of OpenArm:
# action_mapper.py

import numpy as np

# REAL joint limits for OpenArm (from datasheet)
REAL_JOINT_LIMITS = {
    0: (-2.96, 2.96),    # Joint 1 (base) — narrower than sim
    1: (-1.48, 1.48),    # Joint 2 (shoulder)
    2: (-1.48, 1.48),    # Joint 3 (elbow)
    3: (-2.96, 2.96),    # Joint 4 (wrist 1)
    4: (-1.48, 1.48),    # Joint 5 (wrist 2)
    5: (-2.96, 2.96),    # Joint 6 (wrist 3)
    6: (-1.48, 1.48),    # Joint 7 (wrist 4)
    7: (0.0, 1.0),       # Gripper
}

def clip_to_real_limits(action):
    """Clip action values to real joint limits"""
    clipped = np.copy(action)
    for i, (low, high) in REAL_JOINT_LIMITS.items():
        clipped[i] = np.clip(action[i], low, high)
    return clipped
Exponential Moving Average (EMA) Smoothing
VLA model output can jump between steps — in sim this is fine because the simulator accepts anything. On a real robot, sudden jumps cause vibration and motor wear:
class ActionSmoother:
    """Smooth actions with EMA to prevent jerk on real robot"""

    def __init__(self, alpha=0.7, action_dim=8):
        """
        alpha: EMA weight (0.5-0.9)
            - 0.5: very smooth but slow response
            - 0.9: less smooth but fast response
            - 0.7: recommended for manipulation
        """
        self.alpha = alpha
        self.prev_action = np.zeros(action_dim)
        self.initialized = False

    def smooth(self, action):
        if not self.initialized:
            self.prev_action = action.copy()
            self.initialized = True
            return action

        smoothed = self.alpha * action + (1 - self.alpha) * self.prev_action
        self.prev_action = smoothed.copy()
        return smoothed

    def reset(self):
        self.initialized = False
Control Frequency Matching
The control frequency must match the frequency used in simulation:
import time

class ControlLoop:
    """Main control loop — runs on robot controller PC"""

    def __init__(self, server_url, controller, target_hz=20):
        self.server_url = server_url
        self.controller = controller  # OpenArmController
        self.target_hz = target_hz
        self.dt = 1.0 / target_hz
        self.smoother = ActionSmoother(alpha=0.7)

    def run_episode(self, max_steps=400):
        """Run one episode on the real robot"""
        import requests
        import cv2

        camera = cv2.VideoCapture(0)  # USB camera
        camera.set(cv2.CAP_PROP_FRAME_WIDTH, 640)
        camera.set(cv2.CAP_PROP_FRAME_HEIGHT, 480)

        self.smoother.reset()

        for step in range(max_steps):
            step_start = time.time()

            # 1. Capture image
            ret, frame = camera.read()
            if not ret:
                print("Camera error!")
                break

            # 2. Encode image
            _, buffer = cv2.imencode('.jpg', frame,
                                     [cv2.IMWRITE_JPEG_QUALITY, 85])

            # 3. Send to inference server
            response = requests.post(
                f"{self.server_url}/predict",
                files={"image": ("frame.jpg", buffer.tobytes(), "image/jpeg")}
            )
            action = np.array(response.json()["action"])

            # 4. Post-process action
            action = clip_to_real_limits(action)
            action = self.smoother.smooth(action)

            # 5. Send to robot
            self.controller.set_joint_positions(action[:7])  # 7 joints
            self.controller.set_gripper(action[7])           # gripper

            # 6. Maintain control frequency
            elapsed = time.time() - step_start
            if elapsed < self.dt:
                time.sleep(self.dt - elapsed)

            # Log
            if step % 20 == 0:
                hz = 1.0 / max(elapsed, 0.001)
                print(f"Step {step}/{max_steps} | "
                      f"Hz: {hz:.1f} | "
                      f"Action: [{', '.join(f'{a:.2f}' for a in action[:3])}...]")

        camera.release()
Step 4: Reducing the Sim-to-Real Gap
4.1 Domain Randomization (in sim)
If you already used domain randomization when collecting demos in Isaac Lab (as discussed in Part 9), the policy will be more robust. If not, go back and retrain with randomization:
# Domain randomization parameters (Isaac Lab)
randomization = {
    "lighting": {
        "intensity": (0.5, 1.5),     # 50-150% intensity
        "color_temp": (4000, 7000),  # Kelvin
        "direction": "random",
    },
    "camera": {
        "position_noise": 0.02,      # +/-2cm random offset
        "fov_noise": 2,              # +/-2 degree FOV variation
    },
    "box": {
        "position_noise": 0.05,      # +/-5cm position
        "size_scale": (0.8, 1.2),    # 80-120% size
        "texture": "random",         # Random texture each episode
    },
    "table": {
        "friction": (0.3, 0.8),      # Random friction
        "color": "random",
    },
}
4.2 Camera Matching
# Compare sim vs real images
# 1. Capture 1 frame from sim (Isaac Lab)
# 2. Capture 1 frame from real camera
# 3. Compare side by side

# Camera matching checklist:
# [x] Same resolution (640x480 or 224x224 after resize)
# [x] Same FOV (or crop real camera to match)
# [x] Same position relative to robot base
# [x] Same viewing direction (pitch, yaw angles)
# [ ] DO NOT need to match lighting exactly — domain randomization handles this
4.3 Background Simplification
A simple but effective trick: clean up the background. The VLA model sees the entire 224x224 frame — if the background is cluttered (furniture, people walking, screens), the model will be confused.
Good backgrounds for sim-to-real:
[+] White/gray solid-color wall behind
[+] Clean table with only the target carton box
[+] Even lighting without strong shadows
[+] No moving objects in frame

Bad backgrounds:
[-] Monitor/TV behind (bright pixels, scrolling text)
[-] Many objects on table besides target
[-] Natural light that changes (windows)
[-] People walking in frame

4.4 Fine-tune with Real Demos (Optional but Very Effective)
If the real-world success rate is much lower than sim (which will almost certainly happen), collect 10-20 real demonstrations and fine-tune the model:
# Real fine-tuning procedure:
# 1. Teleoperate OpenArm manually for 10-20 successful box grasps
# 2. Record image + joint positions at each step
# 3. Format into dataset matching sim demo format
# 4. Run additional SFT for 500-1000 steps with low LR (1e-6)

# Why only 10-20 demos?
# Because the model already understands manipulation from sim training.
# Real demos only need to teach it to "recalibrate" visual + dynamics.
# Too many real demos (>50) can cause overfitting.
Step 5: Evaluate on the Real Robot
Evaluation Protocol
# eval_real.py
import json
from datetime import datetime

class RealEvaluator:
    def __init__(self, control_loop, num_trials=10):
        self.loop = control_loop
        self.num_trials = num_trials
        self.results = []

    def run_evaluation(self):
        for trial in range(self.num_trials):
            print(f"\n{'='*50}")
            print(f"Trial {trial+1}/{self.num_trials}")
            print(f"{'='*50}")

            # 1. Reset: place carton box on table at random position
            input(f"Place carton box on table at new position, press Enter...")

            # 2. Move robot to home position
            self.loop.controller.go_home()
            time.sleep(2)

            # 3. Run episode
            self.loop.run_episode(max_steps=400)

            # 4. Record result (manual)
            success = input("Grasp successful? (y/n): ").lower() == 'y'
            failure_mode = ""
            if not success:
                failure_mode = input(
                    "Failure mode (miss/position/timeout/collision): "
                )

            self.results.append({
                "trial": trial + 1,
                "success": success,
                "failure_mode": failure_mode,
                "timestamp": datetime.now().isoformat(),
            })

            # 5. Open gripper, go home
            self.loop.controller.open_gripper()
            self.loop.controller.go_home()

        # Summary
        successes = sum(1 for r in self.results if r["success"])
        rate = successes / self.num_trials * 100
        print(f"\n{'='*50}")
        print(f"RESULTS: {successes}/{self.num_trials} = {rate:.1f}%")
        print(f"{'='*50}")

        # Save results
        with open("real_eval_results.json", "w") as f:
            json.dump(self.results, f, indent=2)
Reference Results from Paper (Piper Robot)
The SimpleVLA-RL paper reports real-world results on the Piper robot (7-DoF, different from OpenArm but same class):
+------------------------------------------------------+
|  SimpleVLA-RL Real-World Results (Piper Robot)        |
+---------------------+----------+----------+----------+
| Task                | SFT Only | SFT + RL | Change   |
+---------------------+----------+----------+----------+
| Average (4 tasks)   | 17.5%    | 38.5%    | +120%    |
| Stack Bowls         | 38%      | 70%      | +84%     |
| Click Bell          | 30%      | 60%      | +100%    |
| Fold Towel          | 0%       | 18%      | N/A      |
| Pour Water          | 2%       | 6%       | +200%    |
+---------------------+----------+----------+----------+
| * OpenArm box grasping is expected to match or exceed |
|   Stack Bowls since the task is simpler               |
+------------------------------------------------------+
Based on these results, for OpenArm cardboard box grasping (a simpler task than Stack Bowls), we expect:
- SFT only: 20-35% success rate on real robot
- SFT + RL: 45-70% success rate on real robot
- SFT + RL + real fine-tune (10 demos): 60-80%
Failure Mode Analysis on Real Robot
From practical experience, the most common failure modes when deploying VLA on real robots:
1. Grasp Failure (30-40% of failures)
- Gripper closes too early or too late
- Cause: timing in sim differs from real due to CAN bus latency
- Fix: Increase EMA alpha (smoother actions) or reduce control frequency
2. Positioning Error (25-35% of failures)
- Robot approaches box from wrong angle
- Cause: camera position slightly different from sim
- Fix: Adjust camera mount or fine-tune with real demos
3. Visual Confusion (15-25% of failures)
- Robot "sees" incorrectly because background differs from sim
- Cause: insufficient domain randomization during training
- Fix: Clean up background or retrain with more randomization
4. Motor Overshoot (5-10% of failures)
- Robot overshoots target position then oscillates
- Cause: PID gains on motors do not match sim
- Fix: Tune PID on OpenArm or reduce action magnitude
Tips for Box Grasping Specifically
Grasping cardboard boxes has some specifics to be aware of:
Gripper Opening Must Match Box Size
# Calculate optimal gripper opening
BOX_WIDTH = 0.12  # 12cm box width
GRIPPER_MAX_OPEN = 0.08  # 8cm max opening (OpenArm gripper)

# If box is wider than gripper max -> must grasp the longer edge
# If box fits -> grasping the shorter edge is safer

# In reward function, add condition:
# success = box_lifted AND gripper_force > threshold
# Don't just check position — also check grip force
Top-Down Approach Works Best
For cardboard boxes placed on a table, approaching from above (vertical) yields the highest success rate because:
- Gripper alignment is simple — only need to align X, Y
- Gravity assists the grip — box does not slide sideways
- Less collision with table compared to lateral approach
Domain Randomization for Boxes
# In Isaac Lab, randomize:
box_randomization = {
    "position_x": (0.2, 0.5),    # Range on table
    "position_y": (-0.15, 0.15),  # Left-right
    "rotation_z": (-45, 45),      # Rotate +/-45 degrees
    "size_scale": (0.8, 1.3),     # Size 80-130%
    "texture": ["cardboard_plain", "cardboard_printed",
                "cardboard_worn", "cardboard_wet"],
    "mass": (0.1, 0.5),           # 100g - 500g
}
Complete Pipeline Diagram
+-----------------------------------------------------+
|                COMPLETE PIPELINE                      |
|                                                       |
|  Isaac Lab Sim                                        |
|       |                                               |
|       v                                               |
|  RL Expert Demos (500-1000 episodes)                 |
|       |                                               |
|       v                                               |
|  SFT Training (OpenVLA-OFT) ---- ~20% success       |
|       |                                               |
|       v                                               |
|  RL Training (GRPO) ------------ ~50% success        |
|       |                                               |
|       v                                               |
|  Sim Evaluation (100 episodes)                       |
|       |                                               |
|       v                                               |
|  Sim-to-Real Transfer <-- YOU ARE HERE               |
|       |                                               |
|       v                                               |
|  Real Evaluation (10 trials)                         |
|       |                                               |
|       v                                               |
|  Real Fine-tune (10-20 demos) -- ~65% success        |
|       |                                               |
|       v                                               |
|  Iterate & Improve                                   |
+-----------------------------------------------------+

What Comes Next
After getting the first real-world evaluation results, the improvement loop begins:
- Analyze failure modes — Understand where the robot fails
- Collect more real demos focusing on failure scenarios
- Fine-tune the model on real data
- Re-evaluate — Repeat until reaching target success rate
SimpleVLA-RL gives us a major advantage: instead of just collecting more demos (like pure Imitation Learning), we can go back to sim, run more RL epochs focused on failure scenarios, then transfer back to real. This is closed-loop improvement that pure Imitation Learning cannot provide.
The path from 0% to an autonomous box-grasping robot is not easy — but with SimpleVLA-RL, each iteration brings measurable improvement. Patience and a systematic approach are the keys to success.
Related Posts
- SimpleVLA-RL (10): SFT & RL Training for OpenArm — Train a VLA model for OpenArm with SFT and GRPO
- SimpleVLA-RL (4): Experimental Results — Analysis of original paper results on LIBERO and Piper
- SimpleVLA-RL (2): Detailed Architecture — Deep dive into OpenVLA-OFT and GRPO algorithm