Training and Deploying on OpenArm: From 50 Episodes to Autonomous Box Grasping
In the previous post, you collected 50 box-grasping episodes on OpenArm — that was the fuel. This post is the engine: we will train 3 different policies, compare results, deploy on the real robot, and improve performance with Reinforcement Learning. This is the most comprehensive post in the series — from running the training command to having the robot grasp boxes autonomously without human intervention.
We will cover 3 training options from simple to complex: ACT (fastest, no pretrained model needed), SmolVLA (balancing quality and speed), and Pi0-FAST (most powerful but heaviest). You do not need to run all 3 — read the comparison at the end to choose the right approach.
Option 1: Train ACT — Fastest and Simplest
ACT (Action Chunking with Transformers) is a policy architecture designed specifically for robot manipulation. It requires no pretrained model, no language instruction — just teleoperation data and a mid-range GPU.
Why Start with ACT?
ACT is the perfect "first experiment" choice because:
- Fast training: 1-2 hours on RTX 3090 (50K steps)
- No pretrained weights needed: The model learns entirely from your data
- Stable training: Few hyperparameters to tune, rarely diverges
- Proven baseline: Widely used in the community, easy to compare results
Running Training
lerobot-train \
  --policy.type=act \
  --dataset.repo_id=username/openarm-box-grasp \
  --steps=50000 \
  --batch_size=32
Breaking down each parameter:
--policy.type=act: Uses the ACT architecture — a Transformer encoder-decoder with action chunking (predicting sequences of actions instead of one at a time)--dataset.repo_id: The dataset you collected in the previous post. LeRobot automatically downloads from HuggingFace Hub if not available locally--steps=50000: Number of training steps. With 50 episodes (~15K frames), 50K steps means the model sees each frame approximately 100 times — sufficient for convergence--batch_size=32: Samples per batch. 32 fits comfortably on RTX 3090 (24GB VRAM). For smaller GPUs, reduce to 16
Monitoring Training
LeRobot automatically logs metrics to Weights & Biases (if installed). Key metrics to watch:
train/loss: Should decrease and stabilize. If it suddenly increases, the learning rate is too hightrain/action_mse: Mean Squared Error between predicted and ground truth actions. Lower is bettereval/success_rate: If you configure evaluation (running the policy in simulation), this is the most important metric
After 50K steps, the model is saved at outputs/act/checkpoints/last/pretrained_model/.

When to Use ACT
- First experiment: Confirm the pipeline works (data, train, deploy)
- Simple tasks: A single fixed task, no language control needed
- Limited GPU: RTX 3060/3070 can still handle it (reduce batch_size)
- Quick iteration: Change data, retrain, test — all within a few hours
Option 2: Fine-tune SmolVLA — Balancing Quality and Speed
SmolVLA is HuggingFace's 450M parameter VLA model, designed to run on consumer hardware. The biggest difference from ACT: SmolVLA has been pretrained on community data from multiple robot types — it already carries built-in "manipulation experience."
Why SmolVLA Is the Recommended Choice
As analyzed in the SmolVLA training post:
- Cross-embodiment pretrained: Already learned from SO-100, Koch, Franka data — knows "how to grasp objects" in general
- Language-conditioned: Understands instructions like "Grasp the carton box and lift it" — enables multi-task capability
- Data efficient: 50 episodes are sufficient for fine-tuning (ACT needs more for equivalent performance)
- 450M parameters: Small enough to train on RTX 4090, large enough to capture complex behaviors
Running Fine-tuning
lerobot-train \
  --policy.path=lerobot/smolvla_base \
  --dataset.repo_id=username/openarm-box-grasp \
  --batch_size=64 \
  --steps=20000 \
  --output_dir=outputs/openarm_smolvla \
  --policy.device=cuda
Analysis:
--policy.path=lerobot/smolvla_base: Loads pretrained SmolVLA from HuggingFace Hub. This is where it differs from ACT — you start from a model that already understands manipulation, not random weights--steps=20000: Fewer than ACT (50K) because the pretrained model needs less fine-tuning. Too many steps leads to overfitting--batch_size=64: SmolVLA's architecture allows larger batches thanks to efficient design. If OOM, reduce to 32--policy.device=cuda: Specify GPU. For multiple GPUs:cuda:0,cuda:1...
Estimated Training Time
| GPU | Batch Size | Time (20K steps) |
|---|---|---|
| A100 (80GB) | 64 | ~4 hours |
| RTX 4090 (24GB) | 32 | ~8 hours |
| RTX 3090 (24GB) | 16 | ~12 hours |
| RTX 3060 (12GB) | 8 | ~20 hours (not recommended) |
SmolVLA Fine-tuning Tips
Learning rate: Use a lower learning rate compared to training from scratch. LeRobot's default for fine-tuning is typically 1e-5 — if the model has not converged, try 3e-5. If loss oscillates heavily, reduce to 5e-6.
Frozen backbone: If GPU is limited, you can freeze the vision encoder and only train the action head:
lerobot-train \
  --policy.path=lerobot/smolvla_base \
  --dataset.repo_id=username/openarm-box-grasp \
  --policy.freeze_vision_encoder=true \
  --steps=10000
This is 3-4x faster but performance drops by approximately 5-10%.
Option 3: Fine-tune Pi0-FAST — Most Powerful, Most Demanding
Pi0-FAST (Physical Intelligence + Flow-matching Action Sequence Tokenizer) is the state-of-the-art VLA model. It combines a powerful vision-language model with the FAST tokenizer — converting continuous actions into discrete tokens to leverage language model capabilities for action prediction.
When Do You Need Pi0-FAST?
- Complex tasks requiring fine-grained control
- Flexible language instructions needed (not just one fixed task)
- Powerful GPU available (A100 or better)
- Already tried SmolVLA and want to push performance higher
Running Fine-tuning
lerobot-train \
  --policy.type=pi0_fast \
  --policy.pretrained_path=lerobot/pi0_fast_base \
  --dataset.repo_id=username/openarm-box-grasp \
  --policy.dtype=bfloat16 \
  --policy.gradient_checkpointing=true \
  --steps=50000
Special parameters:
--policy.dtype=bfloat16: Mixed precision training — reduces VRAM by approximately 50% with negligible performance loss--policy.gradient_checkpointing=true: Trades compute for memory — approximately 30% slower but uses significantly less VRAM. Required on RTX 4090
FAST Tokenizer for OpenArm
Pi0-FAST needs to know the robot's specific action space to build its tokenizer. For OpenArm 6-DOF, verify that the tokenizer config is appropriate:
# Check action space
from lerobot.common.datasets.lerobot_dataset import LeRobotDataset
ds = LeRobotDataset("username/openarm-box-grasp")
print(f"Action dim: {ds[0]['action'].shape}")  # Should be (6,) for 6-DOF
print(f"State dim: {ds[0]['state'].shape}")    # Should be (6,)
The FAST tokenizer automatically discretizes continuous actions into tokens based on the action range in the dataset. This is transparent to the user — no manual configuration needed.
Warning: Pi0-FAST training is very VRAM-intensive. On RTX 4090 with gradient checkpointing + bfloat16, maximum batch_size is approximately 8-16. If OOM, reduce batch_size or switch to SmolVLA.
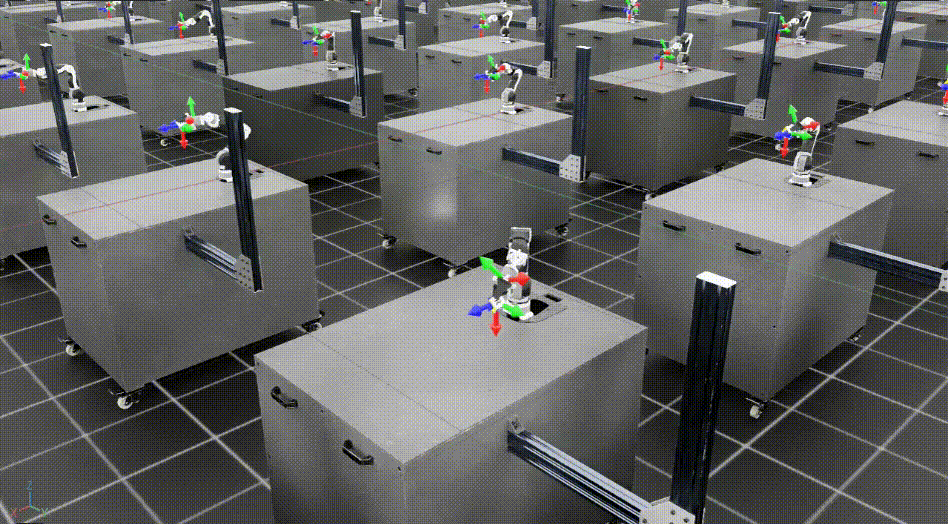
Deploying on the Real Robot — The Moment of Truth
This is the most exciting step — watching the model you just trained autonomously control the robot to grasp carton boxes without you holding the leader arm.
Running Policy Evaluation
LeRobot uses the same lerobot-record script but adds the --policy.path flag to run in autonomous mode:
lerobot-record \
  --robot.type=openarm_follower \
  --robot.port=can0 \
  --robot.side=right \
  --robot.id=my_follower \
  --robot.cameras="{ top: {type: opencv, index_or_path: 0, width: 640, height: 480, fps: 30}}" \
  --dataset.single_task="Grasp the carton box and lift it" \
  --dataset.repo_id=username/openarm-box-eval \
  --dataset.num_episodes=10 \
  --policy.path=outputs/openarm_smolvla/checkpoints/last/pretrained_model
What happens now:
- The robot autonomously decides actions based on camera input and the learned policy
- You stand nearby with your hand on the E-stop button in case the robot moves unexpectedly
- Each episode is recorded to a new dataset (
openarm-box-eval) for later analysis
Evaluating Results
Run 10 evaluation episodes and log results:
| Episode | Result | Notes |
|---|---|---|
| 1 | Success | Accurate grasp, stable lift |
| 2 | Success | Slow approach but successful |
| 3 | Fail | Gripper opened too early, dropped box |
| 4 | Success | - |
| ... | ... | ... |
Expected success rates (with 50 episodes training data):
| Policy | Success Rate | Notes |
|---|---|---|
| ACT (from scratch) | 60-70% | Learning from only 50 episodes, no priors |
| SmolVLA (fine-tuned) | 75-85% | Pretrained manipulation knowledge helps |
| Pi0-FAST (fine-tuned) | 80-90% | Most powerful but needs more compute |
If success rate is below 50%, there is likely a problem with the data or calibration. Go back and check the data collection post.

Improving with HIL-SERL — RL Directly on the Real Robot
If your policy reaches 70-80% but you want to push to 90%+, HIL-SERL (Human-in-the-Loop Sample Efficient RL) is the most effective path. Instead of collecting more demonstrations (time-consuming), you let the robot self-improve through RL with human assistance.
Step 1: Train Reward Classifier
The reward classifier is a small neural network that predicts "did this task succeed or fail?" from camera images. It is trained from the evaluation data you just collected:
# Pseudo-code: train reward classifier
# Use 10 eval episodes already labeled (success/fail)
# Input: final camera frame of the episode
# Output: probability of success (0.0 - 1.0)
HIL-SERL uses this reward classifier instead of binary reward from a simulator — because we are training on a real robot, there is no simulator to query "is the task complete?"
Step 2: Actor-Learner SAC Loop
SAC (Soft Actor-Critic) is the most suitable RL algorithm for real robots because:
- Sample efficient: Needs fewer interactions than PPO/GRPO
- Off-policy: Can reuse data from previous episodes
- Stable: Less likely to diverge in continuous action spaces
The HIL-SERL process:
- Robot performs the task (actor)
- Reward classifier evaluates the outcome
- SAC updates the policy (learner)
- Human intervenes when the robot is about to collide or go in the wrong direction
- Repeat for 100-200 episodes
Step 3: Human Interventions
This is the "Human-in-the-Loop" part — you sit next to the robot with a gamepad or keyboard:
- Press the intervention button when the robot is about to cause danger
- Override control using the leader arm to correct the trajectory
- Resume autonomous mode when the robot is in a safe position
Each intervention becomes a high-value data point — it tells the model exactly "in this state, the current behavior is wrong, here is the correct behavior."
Detailed analysis of HIL-SERL is available in the dedicated post. Read that for the full picture of actor-learner architecture, reward classifier training, and safety guidelines.
Improving with SimpleVLA-RL Style (If Simulation Is Available)
If you are an advanced user and want to leverage the SimpleVLA-RL approach — training RL entirely in simulation then transferring to the real robot — OpenArm has this path available too.
OpenArm in Isaac Lab
OpenArm has a repository supporting NVIDIA Isaac Lab (openarm_isaac_lab). This enables:
- SFT in sim: Use 50 real episodes to train a baseline policy, then generate additional data in simulation
- RL in sim: Apply GRPO/PPO to improve the policy using simulator rewards
- Sim-to-real: Transfer the policy to the real OpenArm
Complete pipeline: SFT (real data) → RL (sim data) → Deploy (real robot)
This is the most powerful but most complex path. You need:
- Accurate URDF/MJCF model of OpenArm
- Domain randomization (texture, lighting, physics) to reduce the sim-to-real gap
- An appropriate reward function for the box grasping task
Advice: If you are just starting, do not go the simulation route first. Start with ACT/SmolVLA, deploy, then HIL-SERL. The sim-to-real pipeline should only be attempted after you have mastered the basic pipeline.
Comprehensive Comparison: ACT vs SmolVLA vs Pi0-FAST
Here is the summary table to help you choose the right policy for your situation:
| Criterion | ACT | SmolVLA | Pi0-FAST |
|---|---|---|---|
| Training time | 1-2 hours | 4-12 hours | 8-24 hours |
| Minimum GPU | 1x RTX 3090 | 1x RTX 4090 | 1x A100 |
| VRAM required | 12-16 GB | 20-24 GB | 40-80 GB |
| Language instruction | No | Yes | Yes |
| Pre-training | No | Yes (community data) | Yes |
| Expected success (50 eps) | 60-70% | 75-85% | 80-90% |
| Multi-task | No (1 task/model) | Yes | Yes |
| Inference speed | Fast (~50Hz) | Medium (~15Hz) | Slow (~5Hz) |
| Setup complexity | Low | Medium | High |
| When to use | First experiment | Production recommended | Push state-of-the-art |
How to Read This Table
- Inference speed matters more than you think. ACT at 50Hz reacts nearly in real time, SmolVLA at 15Hz is still fine for most tasks, Pi0-FAST at 5Hz can cause jittery motion if the task requires fast reactions
- Multi-task: If you want one model to grasp boxes AND place boxes AND stack boxes — ACT needs 3 separate models, SmolVLA/Pi0-FAST need just 1 model with different language instructions
- Expected success is an estimate from community benchmarks, not a guarantee — it depends heavily on data quality
Complete Iteration Workflow
Here is the recommended process, from start to a stably operating robot:
Phase 1: Quick Baseline (Day 1)
- Collect 50 episodes (previous post)
- Train ACT — 1-2 hours
- Deploy and evaluate success rate
- If above 50%, the pipeline works and the data is good
Phase 2: Upgrade Policy (Days 2-3)
- If ACT baseline is good, train SmolVLA fine-tune — 4-12 hours
- Deploy SmolVLA and compare with ACT
- If SmolVLA exceeds ACT by 10%+, use SmolVLA as the primary policy
Phase 3: Collect More Data (Days 4-5)
- If needed, collect 50-100 more episodes
- Diversify: more box sizes, positions, different lighting conditions
- Retrain SmolVLA with the larger dataset
Phase 4: RL Improvement (Days 6-7)
- If you want to push above 85%, use HIL-SERL
- Run 100-200 RL episodes with human intervention
- Re-evaluate success rate
Phase 5: Advanced (Week 2+)
- If language control is needed, try Pi0-FAST
- If you want sim-to-real, set up the Isaac Lab environment
- Scale to multi-task: add "stack boxes," "sort by size"...
Summary: Complete Pipeline from Unboxing to Autonomous Grasping
Across these 2 posts (parts 7 and 8), we have covered the entire pipeline:
- Hardware setup: CAN bus, camera, calibration
- Data collection: 50 teleoperation episodes with LeRobot
- Training: ACT (baseline) → SmolVLA (recommended) → Pi0-FAST (advanced)
- Deployment: Running the policy on the real robot, evaluating success rate
- RL improvement: HIL-SERL for an additional 10-15% improvement
This pipeline is not limited to box grasping. You can use the same workflow for any manipulation task: stacking objects, pouring water, assembly... The only changes are the task description and training data.
This is the power of the end-to-end learning approach: you do not need to write complex control code for each task — just demonstrate to the robot, train, and deploy. And with OpenArm plus LeRobot, this pipeline is accessible to anyone with $3,500 and a GPU.
If you are new to this series, read SimpleVLA-RL (1): Overview to understand the big picture. And if you want a deeper understanding of the RL training process for VLA, that post explains the GRPO algorithm in detail and why it works so effectively.
Related Posts
- SimpleVLA-RL (7): Collecting Data for OpenArm — Guide to collecting 50 box-grasping episodes
- SmolVLA Training with LeRobot — Detailed SmolVLA 450M fine-tuning walkthrough
- HIL-SERL: RL on Real Robots — Improving policies with human-in-the-loop reinforcement learning

