Collecting Data for OpenArm: From Unboxing to 50 Box-Grasping Episodes
You already understand the theory behind SimpleVLA-RL — a framework that uses Reinforcement Learning to improve VLA models in simulation. You also know why OpenArm is the ideal hardware platform for manipulation experiments. Now it is time for the most critical hands-on step: data collection.
In robotics, data is fuel. Even the most powerful AI model is useless without quality data to learn from. This post walks you through every step — from plugging in CAN bus wires to having 50 box-grasping episodes ready for upload to HuggingFace Hub. If you are a beginner, do not worry — everything is explained in detail, with practical tips that only come from real-world experience.
Hardware Checklist: What Do You Need?
Before starting, verify you have all the required equipment:
| Equipment | Description | Estimated Price |
|---|---|---|
| OpenArm follower | Robot arm that performs the task — 6 DOF with Damiao motors | ~$3,500 (single arm) |
| OpenArm leader | Control arm for teleoperation — same configuration | Included in bimanual kit (~$6,500) |
| CAN bus USB adapter | Connects robot to computer via CAN protocol | ~$20-50 (CANable, PCAN-USB) |
| Linux PC with GPU | Ubuntu 22.04+, NVIDIA GPU (minimum RTX 3060) | Your existing machine |
| USB camera | Standard webcam, 640x480 or higher, 30fps | ~$30-100 (Logitech C920+) |
| Carton boxes | Various sizes (small, medium, large) | Free — use shipping boxes |
| Workbench | Flat, stable surface with enough room for robot operation | Your existing desk |
Important note: If you only have one arm (no leader), you can still collect data using gamepad or keyboard teleoperation. However, leader-follower teleoperation produces significantly better data quality because the motions are more natural and fluid.

Step 1: CAN Bus Setup — Connecting Robot to Computer
CAN bus (Controller Area Network) is the communication protocol OpenArm uses between the computer and Damiao motors. If you have worked with automotive or industrial systems, you are already familiar with CAN. If not — think of it as a "data highway" connecting the computer to each robot joint.
Wiring
- Connect CAN USB adapter #1 to a USB port, then wire CAN-H and CAN-L to the follower arm
- Connect CAN USB adapter #2 to a different USB port, then wire CAN to the leader arm
- Ensure there is a 120 ohm termination resistor at the end of each bus (many adapters have one built in — check the datasheet)
Interface Configuration
LeRobot provides a built-in CAN setup script. Run these commands:
# Setup CAN interfaces (can0 for follower, can1 for leader)
lerobot-setup-can --mode=setup --interfaces=can0,can1
This command will:
- Load the
gs_usb(orcan_raw) kernel module - Set the bitrate appropriate for Damiao motors (typically 1Mbps)
- Bring up the
can0andcan1interfaces
Verify Connection
# Test whether CAN bus is working
lerobot-setup-can --mode=test --interfaces=can0,can1
If successful, you will see output like:
[OK] can0: Detected 6 motors (Damiao DM-J4340-2EC)
[OK] can1: Detected 6 motors (Damiao DM-J4340-2EC)
All interfaces ready!
Common troubleshooting:
- "No device found": Check USB cables, try a different USB port
- "Permission denied": Add your user to the
dialoutgroup:sudo usermod -aG dialout $USER, then logout and log back in - "Timeout waiting for motors": Check robot power supply — motors must be powered on before CAN communication works
- Only detecting 5/6 motors: Check the CAN bus connector at the missing joint — the wire may be loose
Step 2: Install LeRobot with Damiao Motor Support
LeRobot is HuggingFace's open-source framework for robot manipulation. The latest version (v0.5+) supports OpenArm and Damiao motors natively.
# Install LeRobot from PyPI
pip install lerobot

# Install Damiao motor driver
pip install -e ".[damiao]"
Why .[damiao]? Damiao motors use a proprietary CAN protocol different from Dynamixel (used on SO-100/Koch). LeRobot separates motor drivers into optional dependencies to keep the main package lightweight. The [damiao] flag installs the pydamiao library for CAN bus communication with the motors.
Verify successful installation:
python -c "import lerobot; print(lerobot.__version__)"
# Output: 0.5.x or newer

python -c "from lerobot.common.robots.openarm import OpenArmFollower; print('OpenArm OK')"
# Output: OpenArm OK
Step 3: Calibrate Follower and Leader
Calibration is an extremely important step that many people skip or rush through. Calibration determines the "zero" position and movement limits of each joint. If calibration is wrong, the robot will move differently from what you intend — and an AI model trained on bad data will produce terrible results.
Calibrate the Follower (Task Arm)
lerobot-calibrate \
  --robot.type=openarm_follower \
  --robot.port=can0 \
  --robot.side=right \
  --robot.id=my_follower
The script will ask you to move the robot to reference positions. For OpenArm, the typical procedure is:
- Home position: Move the robot to a vertical pose, all joints at 0 degrees
- Joint limits: Move each joint to its min/max limits
- Gripper calibration: Open fully, then close fully
Calibration results are saved to ~/.cache/lerobot/calibration/my_follower.json. This file contains angle offsets and joint limits — keep this file and you will not need to recalibrate unless you physically disassemble the robot.
Calibrate the Leader (Control Arm)
lerobot-calibrate \
  --teleop.type=openarm_leader \
  --teleop.port=can1 \
  --teleop.id=my_leader
The process is similar to the follower. The key difference: the leader typically has gravity compensation disabled (motors do not hold joints) so the human operator can move freely and directly feel the required forces.

Calibration tips from real-world experience:
- Calibrate on a flat, fixed surface — if the table vibrates, results will be noisy
- Use a protractor or digital level for more accurate home positioning
- Calibrate both arms in the same session — ensures consistent coordinate systems
- After calibration, test by moving the leader. The follower should mirror exactly. If there is a small offset, recalibrate
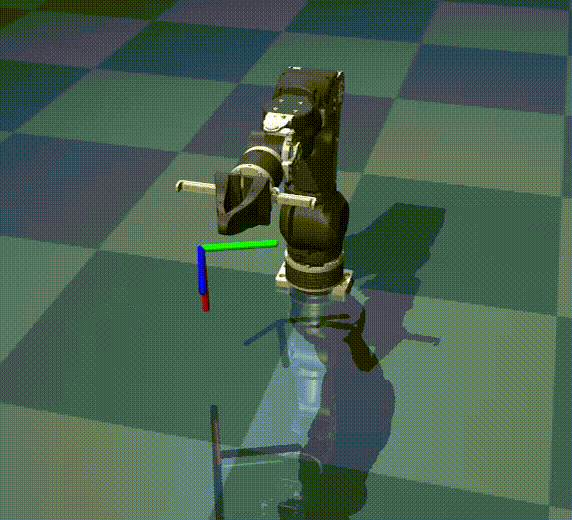
Step 4: Test Teleoperation — Practice Before Recording
Teleoperation is the process where you (the human) control the follower through the leader. This is your "practice run" before officially recording data.
lerobot-teleoperate \
  --robot.type=openarm_follower \
  --robot.port=can0 \
  --robot.side=right \
  --robot.id=my_follower \
  --teleop.type=openarm_leader \
  --teleop.port=can1 \
  --teleop.id=my_leader
When you run this command, the follower will mirror every movement of the leader in real time. You move the leader by hand, and the follower follows.
Why Practice Matters
Collecting data for robot learning is not like recording a video. Each episode must be:
- Consistent: Same task, performed with a similar pattern (not wildly different between episodes)
- Smooth: Fluid motion without jerky movements (jittery motion creates action noise)
- Complete: Start from a ready position, perform the task, end at a success position
Spend 15-20 minutes practicing the box-grasping motion before recording:
- Approach the box from above (top grasp) — easiest for parallel grippers
- Approach the box from the side (side grasp) — harder but more versatile
- Try different box sizes
- Practice: open gripper, lower down, close gripper, lift up, hold steady
Important tip: Keep movement speed moderate. Too fast and the follower cannot keep up (latency ~20-50ms at 30fps). Too slow and episodes become long, wasting disk space and training time.
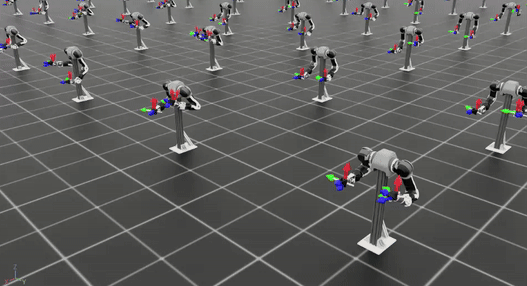
Step 5: Record the Dataset — 50 Box-Grasping Episodes
This is the main event. LeRobot provides the lerobot-record script that automates the entire process: recording joint positions plus camera frames and packaging them into a standardized dataset.
lerobot-record \
  --robot.type=openarm_follower \
  --robot.port=can0 \
  --robot.side=right \
  --robot.id=my_follower \
  --robot.cameras="{ top: {type: opencv, index_or_path: 0, width: 640, height: 480, fps: 30}}" \
  --teleop.type=openarm_leader \
  --teleop.port=can1 \
  --teleop.id=my_leader \
  --dataset.repo_id=username/openarm-box-grasp \
  --dataset.single_task="Grasp the carton box and lift it" \
  --dataset.num_episodes=50 \
  --dataset.fps=30
Let us break down each parameter:
--robot.cameras: Camera configuration.topis the camera name (you can choose any name).index_or_path: 0is the default webcam. 640x480 at 30fps is sufficient for most tasks.--dataset.repo_id: Dataset name on HuggingFace Hub. Format:username/dataset-name. Replaceusernamewith your HuggingFace username.--dataset.single_task: A brief English description of the task. This is the language instruction the VLA model will receive during inference.--dataset.num_episodes: Number of episodes to collect. 50 is the minimum for fine-tuning — more (100-200) will produce better results.--dataset.fps: Sampling frequency. 30fps means 30 (state, action, image) tuples recorded per second.
Workflow for Each Episode
When running lerobot-record, the terminal displays a control interface:
- Press Enter to start a new episode
- Perform the task: Use the leader to control the follower, grasping a carton box and lifting it
- Press S to end the episode (success) or Press F to mark it as failed (will be discarded)
- Reset the box to a new position, then return to step 1
Each episode typically lasts 5-15 seconds (150-450 frames at 30fps). Total time for 50 episodes: approximately 30-45 minutes including reset time.
Smart Allocation of 50 Episodes
Do not grasp the same box in the same position 50 times — the model will overfit. Instead, diversify:
| Variation | Episodes | Details |
|---|---|---|
| Small box (10-15cm) | 15 | 5 positions x 3 approach angles |
| Medium box (15-25cm) | 20 | 5 positions x 4 approach angles |
| Large box (25-35cm) | 10 | 5 positions x 2 approach angles |
| Failure recovery | 5 | Intentionally miss, then correct and grasp successfully |
Why include recovery episodes? In practice, the robot will sometimes miss a grasp. If training data only contains "perfect grasps," the model will not know how to handle a miss — leading to failure cascades. Having 5-10% recovery episodes teaches the model self-correction.
Data Quality Tips — What Makes the Difference
Data collection is an art, not just science. Here are tips from real-world experience that documentation rarely mentions:
1. Consistent Lighting
The camera is the robot's "eyes." If lighting changes between episodes (clouds blocking sun, lights turning on/off), the model will be confused. Solutions:
- Use fixed LED lights instead of natural light
- Avoid shadows on the workspace — use diffused lighting
- If using natural light, collect data at the same time of day consistently
2. Clean Background
The workspace should be simple, with minimal distracting objects. The robot is learning to grasp carton boxes — if the table also has water bottles, phones, books... the model may attend to irrelevant objects. Keep only carton boxes plus the table surface.
3. Fixed Camera Angle
Do not move the camera between episodes. Mount it securely or use a tripod. If the camera shifts even a few millimeters, pixel-level features change and the model needs more data to generalize.
4. Record Metadata Notes
Create a simple notes file:
Episodes 1-15: Small red box, center to right positions
Episodes 16-35: Medium brown box, left to center positions
Episodes 36-45: Large white box, random positions
Episodes 46-50: Recovery (intentional miss → correct → grasp)
This metadata is invaluable when debugging model performance later — knowing which episodes contain which variations helps analyze failure modes.

Using Community Data from HuggingFace Hub
One of the biggest advantages of LeRobot is the community data ecosystem. You do not necessarily have to collect everything from scratch.
Browse Available Datasets
Visit HuggingFace Hub and search with the keyword lerobot. You will find hundreds of community datasets:
lerobot/so100_pick_place— Pick-and-place dataset with SO-100 armlerobot/koch_push_cube— Cube pushing with Koch arm- And many more for diverse tasks
Cross-Embodiment Transfer Learning
This is the strength of VLA models like SmolVLA. SmolVLA is pretrained on data from multiple robot types (SO-100, Koch, Franka) — it has already learned general manipulation priors: how to approach objects, how to open/close grippers, how to lift objects stably.
When you fine-tune SmolVLA on 50 OpenArm episodes, it does not have to learn from scratch. Instead:
- Pretrained knowledge (from thousands of episodes on SO-100/Koch) provides general manipulation "sense"
- Fine-tune data (your 50 OpenArm episodes) teaches the model how to adapt to OpenArm's specific kinematics
- Result: high data efficiency — 50 episodes are enough to reach 70-85% success rate
In contrast, if you train ACT from scratch (no pretrained model), 50 episodes only yield about 40-60% success rate. You would need 200-500 episodes to match the same performance.
Download and Explore Community Datasets
# Download a community dataset
python -c "
from lerobot.common.datasets.lerobot_dataset import LeRobotDataset
ds = LeRobotDataset('lerobot/so100_pick_place')
print(f'Dataset: {len(ds)} frames, {ds.num_episodes} episodes')
print(f'Tasks: {ds.tasks}')
"
You can use community datasets to pretrain and then fine-tune on your own OpenArm data — this approach is called staged training and typically produces better results than direct training.
Data Format: LeRobotDataset
LeRobot stores data in the standardized LeRobotDataset format, designed and optimized for robot learning:
Directory Structure
openarm-box-grasp/
├── meta/
│   ├── info.json          # Metadata: fps, robot type, task description
│   ├── episodes.jsonl     # Per-episode info (timestamps, success/fail)
│   └── tasks.jsonl        # List of task descriptions
├── data/
│   ├── chunk-000/
│   │   ├── episode_000000.parquet  # Joint states + actions
│   │   ├── episode_000001.parquet
│   │   └── ...
├── videos/
│   ├── chunk-000/
│   │   ├── top/
│   │   │   ├── episode_000000.mp4  # Camera frames
│   │   │   ├── episode_000001.mp4
│   │   │   └── ...
What Do the Parquet Files Contain?
Each Parquet file contains a table with these columns:
| Column | Description | Shape |
|---|---|---|
state |
Current joint positions | (6,) for 6-DOF |
action |
Target joint positions (command) | (6,) |
timestamp |
Time within the episode | scalar |
episode_index |
Episode index | scalar |
frame_index |
Frame index within episode | scalar |
task_index |
Task index | scalar |
Automatic Upload to HuggingFace Hub
After collection finishes, lerobot-record automatically uploads the dataset to HuggingFace Hub. You need to log in first:
huggingface-cli login
# Enter your token from https://huggingface.co/settings/tokens
The dataset will be available at: https://huggingface.co/datasets/username/openarm-box-grasp
You can visualize the dataset directly on the Hub — watch episode videos, check action distributions, and spot outliers.
Dataset Quality Check
After collection, verify quality before training:
from lerobot.common.datasets.lerobot_dataset import LeRobotDataset
import numpy as np

ds = LeRobotDataset("username/openarm-box-grasp")

print(f"Total episodes: {ds.num_episodes}")
print(f"Total frames: {len(ds)}")
print(f"Average episode length: {len(ds) / ds.num_episodes:.0f} frames")

# Check action range
actions = np.array([ds[i]["action"].numpy() for i in range(len(ds))])
print(f"Action range: [{actions.min():.3f}, {actions.max():.3f}]")
print(f"Action std: {actions.std(axis=0)}")

# Check for episodes that are too short or too long
for ep_idx in range(ds.num_episodes):
    ep_len = len(ds.get_episode(ep_idx))
    if ep_len < 30:  # < 1 second at 30fps
        print(f"WARNING: Episode {ep_idx} too short ({ep_len} frames)")
    if ep_len > 900:  # > 30 seconds
        print(f"WARNING: Episode {ep_idx} too long ({ep_len} frames)")
Red flags to watch for:
- Episode too short (<1s): You may have pressed end too early
- Episode too long (>30s): You may have forgotten to press end or moved too slowly
- Action std near 0 for a joint: That joint did not move — check calibration
- Action range outside limits: Calibration error
Summary and Next Steps
You have completed the most important part of the pipeline: collecting 50 box-grasping episodes on OpenArm. Here is a recap of what was accomplished:
- Set up CAN bus connecting the robot to the computer
- Installed LeRobot with Damiao motor support
- Calibrated both follower and leader arms
- Practiced teleoperation
- Recorded 50 diverse episodes (varying sizes, positions, approach angles)
- Verified dataset quality
In the next post — SimpleVLA-RL (8): Training & Deploying on OpenArm — we will use this dataset to train 3 different policies (ACT, SmolVLA, Pi0-FAST), deploy on the real robot, and improve performance with HIL-SERL. That is when the data you just collected truly shows its value.
If you want a deeper understanding of the VLA training process, read part 3 of this series. And if you are interested in how HIL-SERL improves policies on real robots, that post provides a comprehensive overview.
Related Posts
- SimpleVLA-RL (1): Framework Overview — Understand the complete pipeline from SFT to RL on VLA models
- SmolVLA Training with LeRobot — Detailed guide to fine-tuning SmolVLA 450M on robot data
- HIL-SERL: RL on Real Robots — Improving policies with human-in-the-loop reinforcement learning